
Where the number of doctors, engineers, and computer scientists is increasing, creative professionals are equally coming strong. Unique content by writers, in-depth artwork by artists, and unique shots by photographers have brought consciousness to the world. The photographers use a watermark on their photos to protect their identity and establish brand awareness.
Fortunately, the article presents workable tools on the different operating systems. The step-by-step guide also addresses the concern of how to watermark photos in easy series of steps. Microsoft Paint 3D, Preview, eZy Watermark Photos Lite, and PixCut would also be the crux of this write-up.
Part 1: How to Add Watermark for Free on Windows – Microsoft Paint 3D
It is essential to access a good editing tool that makes the process frictionless to watermark photos. Microsoft Paint 3D is an inbuilt watermarking software in Windows 10 operating system. The application allows users to insert their brand name across borders or any other position in the image. As a refresh of Microsoft Paint, MS Paint 3D makes it easy to unleash one’s creativity and imagination through an extensive set of features.
Considered the easiest way to watermark photos, let us find out the procedure for doing so.
Step 1: Navigate to the search box and click on “Microsoft Paint 3D” from the list of applications that pop up. Tap “Menu” from the top left corner and locate the targeted image.
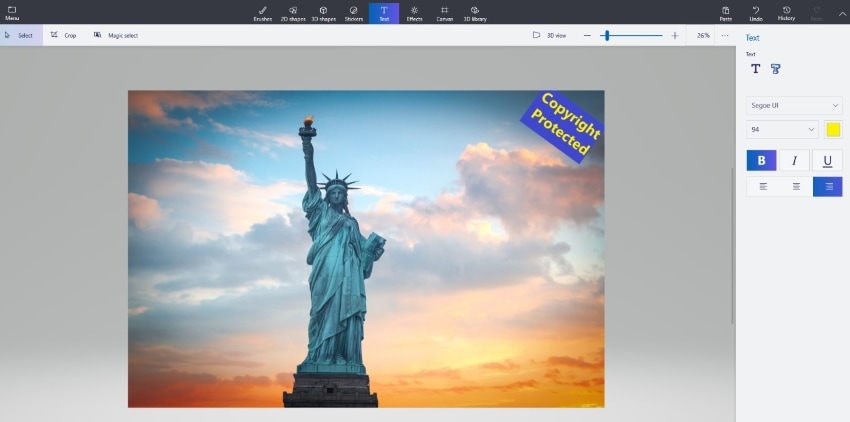
Step 2: The image comes in the interface. Now, click on “Text” from the top center panel and choose between 2D and 3D text.
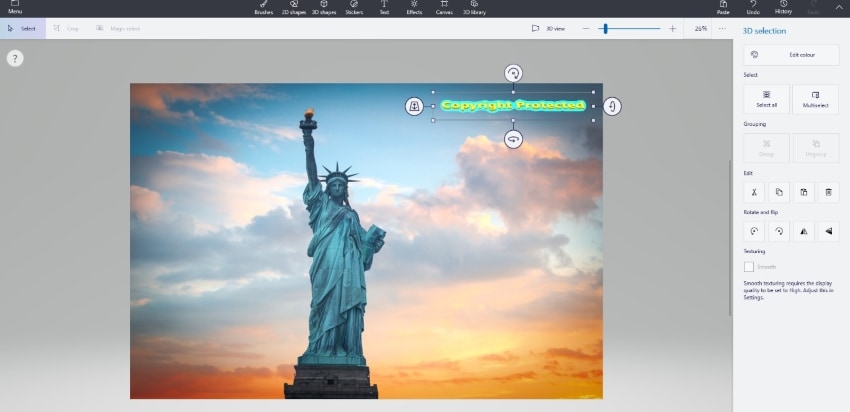
Step 3: Alter several settings based on font type, style, color, and position of the watermark. If you choose 3D text, the settings are related to rotating the watermark and its positioning.
Part 2: How to Add Watermark for Free on macOS – Preview
How to watermark photos on Mac is a significant concern these days, owing to the popularity of Mac operating systems. Preview is one such vendor-supplied built-in image viewer app that also acts as a PDF viewer. The Preview app not only views digital media but it edits the media types. The watermark feature is one of the most significant usages of this tool.
To know how to watermark photos on Preview, follow the guide given below.
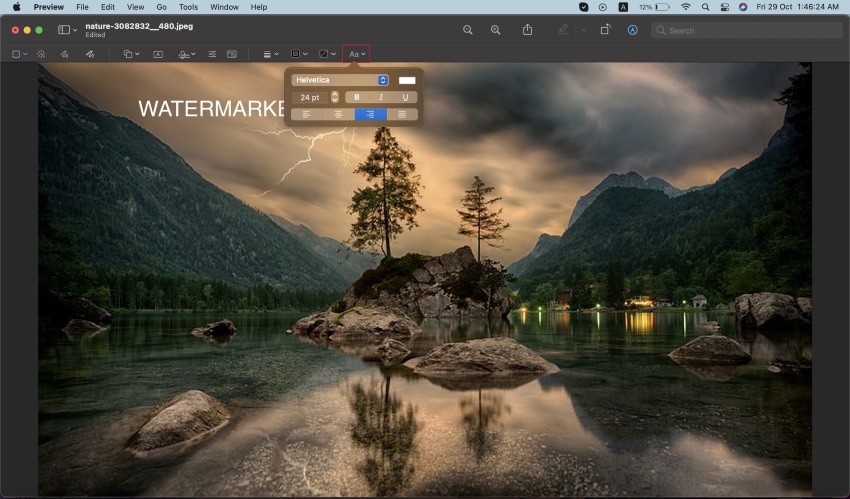
Step 1: Launch “Preview” from your Mac system, and as the interface pops up, click on the “View” tab. Hit “Show Markup Toolbar” afterward. Click on the “A” icon to add text to the image.

Step 2: Type the required watermark and use the “Aa” icon from the top panel to format your watermark. Position the watermark after you are done.
Step 3: Navigate to the “File” option and hit “Save.” The image with text watermark is saved.

Part 3: How to Add Watermark on iOS – eZy Watermark Photos Lite
The iPhone users have enhanced multifold globally due to the extensive features Apple brings to the table. Essentially, one requires software that helps watermark photos. The section discusses how to watermark photos on iPhone in the most influential fashion. eZy Watermark Photos Lite presents an easy-to-use interface with exceptional watermarking options.
The customized watermarking options give the user independence to use text, signature, date, QR code, time, trademark, copyright, logo, etc. The diverse import and export options to social media websites make the whole process frictionless and productive.
The procedure below covers how to watermark photos using the eZy Watermark Photos Lite application.
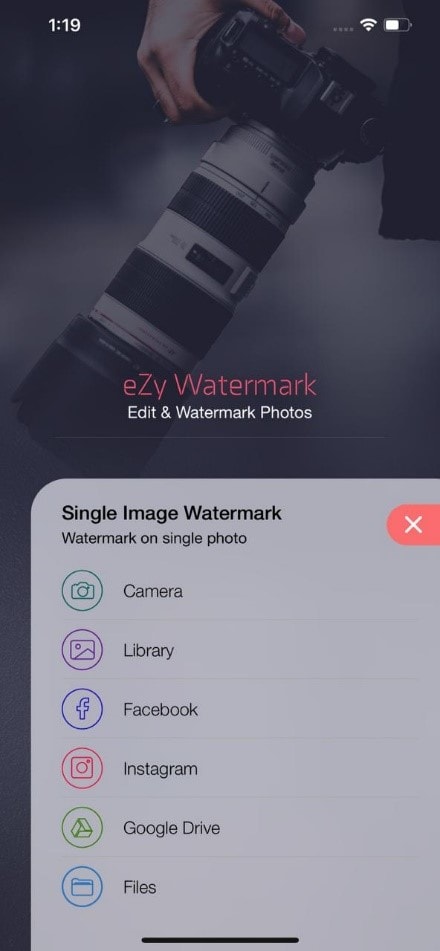
Step 1: Go to the App Store and download the eZy Watermark Photos Lite tool from there. Launch the software after the installing process is concluded.

Step 2: Click on “Single Image Watermark” and import the targeted picture from your iOS device. The editor is launched in seconds and shows a (+) sign at the bottom. Click on it.
Step 3: The eZy Watermark Photos Lite offers several options to display the watermark. It includes QR codes, stickers, autographs, logos, text, or images from the gallery. Position the watermark on the imagery.

Step 4: Hit the “Export” option in the bottom right corner and tap “Gallery” afterward. The watermark is saved on the picture.

Part 4: How to Add Watermark on your Android Device – Add Watermark on Photos
If you are an Android user and a professional photographer, allow me to introduce you to the “Add Watermark on Photos” tool. Easily downloadable from Play Store, the app lets the user create and save watermark from the comforts of a smartphone.
One can choose the preset templates or create own logo. As a watermark photos freeware, the tool allows batch processing of watermarks that have brought productivity to the field. To watermark photos using this impeccable tool, follow the process below vividly.
Step 1: Download the software and wait until the installation process is concluded. Launch the interface afterward. From the list of choices, pick “Apply on Images.”

Step 2: Multiple albums appear from your gallery. Select the targeted photo and tap the tick mark sign located on the bottom right corner of the interface. Click on “Create Watermark” afterward.
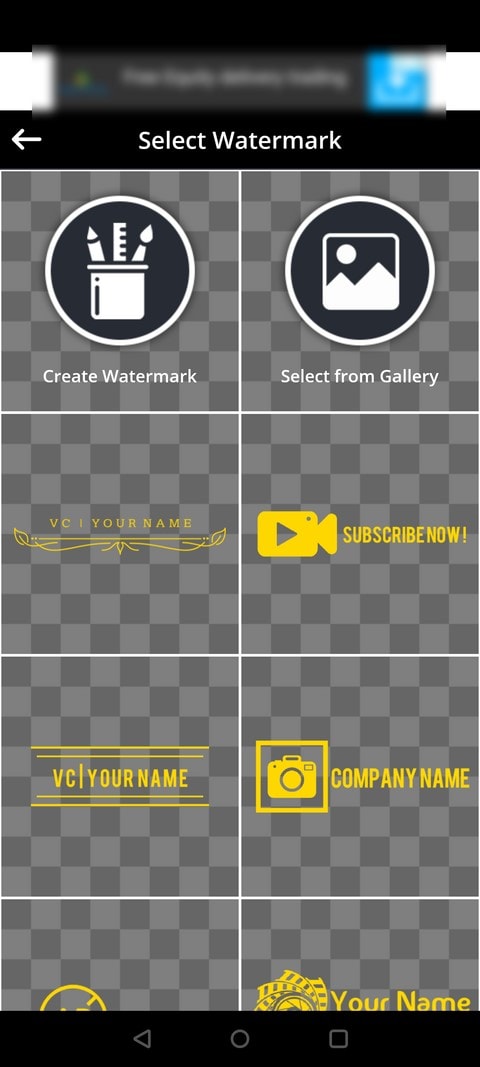
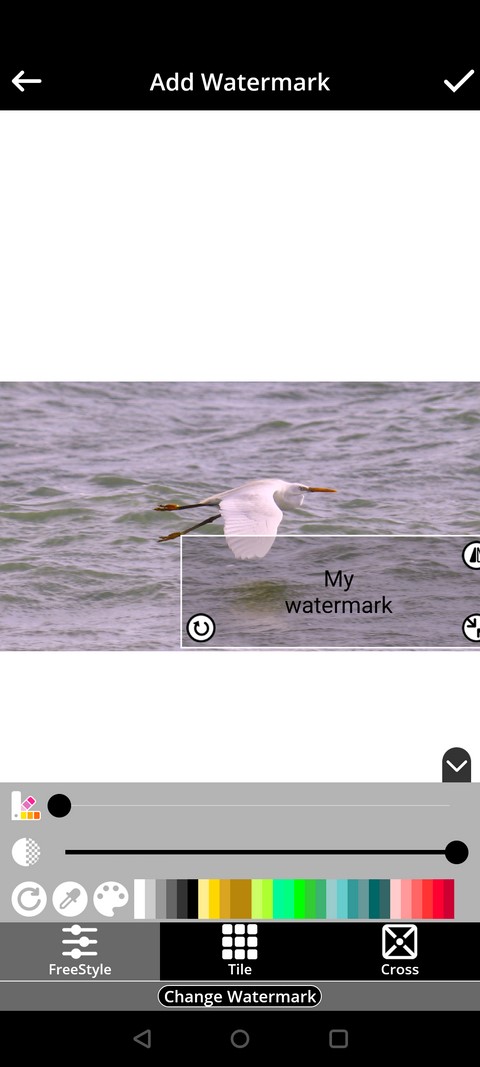
Step 3: Click on “Text” to type the watermark or “Image” to choose from the system. Type the text and position it on the photo. Hit the tick mark again situated at the top right corner. It would be followed by a save sign to save the image on the device.
Bonus Tip: How to Remove Watermark from an Image Using PixCut
Creative professionals watermark photos to bring authenticity to the lot. However, removing watermark is equally essential in different situations. To offer the image an informal vibe, people remove watermarks. Most established photographers and artists also remove the watermarks from their work to ensure a high-quality preview. Therefore, one requires an online watermark remover tool.
Creating a storm in the market with Al technology, Wondershare PixCut has allowed users to edit pictures from the comforts of their homes. Be it removing watermark and backgrounds or enlarging the image, PixCut has covered its basis.
Remove the watermark through this tool through the guide given below.
Step 1: Launching the Tool
First of all, launch Wondershare PixCut from your system and navigate to “Watermark Remover” from the interface. Click on it.

Step 2: Removing the Watermark
Drop the targeted image, upload it, or paste its URL. The image appears on the editor. Use the brushstroke size to change the highlighter magnitude according to the watermark. Hit “Remove Objects” afterward.

Step 3: Saving the Image
Tap “Download” from the top right corner and save the image.

Concluding Remarks
We often run into pictures daily that have a watermark sign across their borders. The watermark promotes the brand and helps in figuring out the name behind the exceptional work. The article offered a quick overview of watermark photos freeware applications in the industry that are helpful to watermark photos in simple steps.
However, if you want to remove the watermark, consider Wondershare PixCut at your disposal at all times. The Al technology helps the user remove watermark as effortlessly as possible.
People Also Ask
Can I protect my pictures online?
You can protect your photos online by adding watermark, using advanced barcoding, and making sure that copyright to metadata is added. Never share a high-resolution image and compress the photos that you upload. Additionally, read the terms and conditions of the website that you post your pictures to.
Can you sue people for stealing your images?
If the images are registered through the US Copyright Office, a claim can be filed against people who steal the images. Use LAPIXA to take legal action against them.