here are endless reasons why you’d want to remove background from an image and make it transparent. Whether you are creating a graphic by overlaying different pictures or simply designing your brand’s logo, it’ll be important to make the image transparent so that it can look more appealing.
Images that have a transparent background can be used on any color-scheme, which means you’ll have the liberty to use them for different purposes. Many social media marketers even create transparent images to make their social media posts more engaging.
If you’re also looking to make a transparent background for an image, this guide will help. In today’s article, we’ll take a look at different solutions on how to remove the default background of a picture and make it transparent.
In this article
Part 1 Why Background Transparent is needed for Marketing
Before proceeding further, let’s first understand why you would want to remove the background from an image. The truth is an image with a transparent background gives you the power to make your designs more appealing. For instance, if you want to add your brand’s watermark on a social media post, it’ll be important to remove its background so that it doesn’t cover unnecessary space of the original image itself.
>Similarly, if you want to design a logo for your website, removing its background will give you the liberty to use it anywhere on the website. Here are some of the additional reasons why it’s important to remove the background of an image.
- The transparent background makes it easier to layer different images over one another
- You want to replace the background with a different one to make your design more appealing
- You’re planning to create graphics for your social media account and want to make them as engaging as possible.
Part 2 How to Make an Image Background Transparent
Now that you know the importance of a transparent background, let’s quickly dive into the two different solutions to make transparent background for different images.
2.1 Make Background Transparent Online
The most convenient way to remove background from an image is to use an online tool such as Wondershare PixCut. It’s an online background removal tool that’s specifically designed to get rid of the current background and make it transparent. With PixCut, you can erase background from different types of pictures including portraits, product photos, and even social media graphics.
PixCut is an AI-powered tool, which means the tool will automatically detect and remove the background for you. Unlike many editing applications, you won’t have to manually mark the background, which can often get time-consuming. PixCut’s AI is capable of removing background from complex images as well without losing any details of the subject itself.
Here’s the step-by-step process to get a transparent image online using Wondershare Pixcut.
Step 1 - Go to PixCut and click “Upload Image”. Choose the image whose background you want to remove. Alternatively, you can also upload an image by pasting its URL.

Step 2 - PixCut will automatically start removing the background from the image. This process will only take a few seconds to complete.
Step 3 - Once the background is removed, you’ll see the final image on the right side of the screen. Now, either click “Download Free” or “Download HD” to save the image on your PC. If you want to choose the latter, you’ll have to spend 1 credit from your account.

That’s how quick and effective it is to remove background from an image using Wondershare PixCut.
2.2 Make Image Transparent with Software
Another way to make image background transparent is to use a dedicated editing tool. While there are many tools that can do the job, the majority of designers choose Adobe Photoshop. It’s a fully-functional software that comes with a wide variety of editing tools. These tools will help you unleash your creativity and craft visually appealing designs.
When it comes to removing background from an image, Adobe Photoshop has different features in its arsenal that’ll help you get the job done. The only downside of using Photoshop for background removal is the high complexity. Unlike PixCut, Photoshop doesn’t have the Smart AI feature to automatically detect the background. This means that you’ll have to manually mark the edges of the subject to erase the background. So, if you’re not an experienced designer, it’ll most likely get challenging to make a transparent background using Photoshop.
Follow these steps to remove a background from an image using Adobe Photoshop.
Step 1 - Launch Photoshop on your computer. Click “File>Open” to load the image whose background you want to remove.
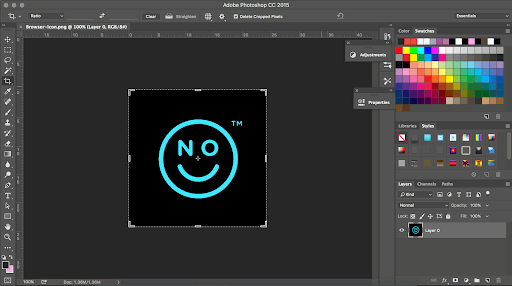
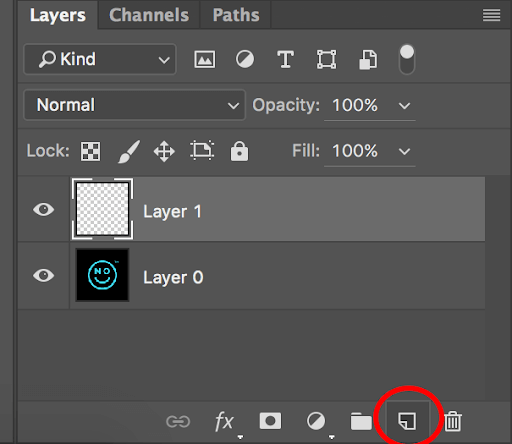
Step 2 - Tap “Layer>New Layer” to add a new layer. Make sure to place the new layer right below the original layer.
Step 3 - Select the “Magic Wand” tool from the left menu bar. Change the “Tolerance” value to 32 or adjust the value as per your design.
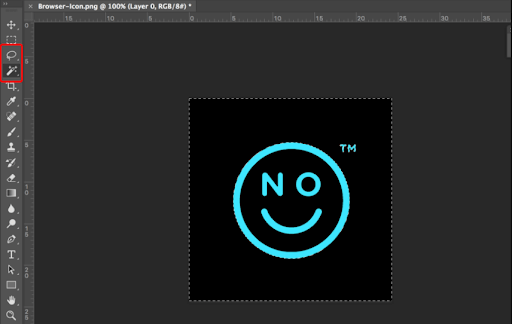
Step 4 - Use the “Magic Wand” tool to manually mark the background or the area that you want to make transparent.
Step 5 - After selecting the background, press “Delete”. The selected background will be removed and you’ll see a transparent image on your screen.

Step 6 - If you’re working on an image with inner circles, you’ll have to again repeat the process to erase the unwanted area from the image.
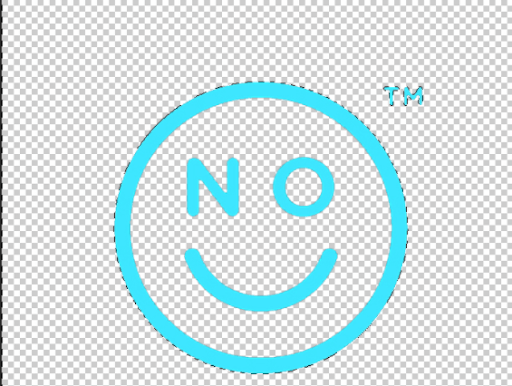
Step 7 - Once your logo becomes completely transparent, click “File>Save As” and choose the output file format as PNG. Finally, click “Save” to save the transparent picture on your PC.

Conclusion
Using a transparent background in an image is the most convenient way to design the perfect graphics for marketing purposes. Whether you want to design a brand logo or a regular social media post, the above-mentioned methods will help you make image background transparent. However, if you’re looking for a quick solution to erase the background of an image, it would be better to choose PixCut. It’ll automatically detect and remove the background and you’ll get a transparent image within a few seconds.
