
Being a professional in the industry means paying attention to even the slightest of details, as they can make or break the entire construct of the image. Oftentimes, during a photoshoot, unnecessary objects such as flown-out hair or frizz can be caught in the frame. Although seemingly small and irrelevant, they can significantly decrease the overall quality of the image.
To avoid such mistakes, it is necessary to remove such unwanted items from your image background. That is what the following article deals with. Learn all about cutting hair in Photoshop using simple steps. If you don‘t want to put in the manual effort, you can make use of Wondershare PixCut, which is an easier alternative to Photoshop.
Part 1Cutting Out Hair in Photoshop
Adobe Photoshop is one of the most popular professional-level graphics editing software. Everyone from designers to photographers and illustrators loves Photoshop, and for a good reason. With its one-of-a-kind tools and skillsets, Photoshop is capable of bringing out the best in your images. From retouching photos to digital crafting, Photoshop lets you do everything.
You can bring your images and graphics to life using Photoshop‘s proficient tools and services. Be its effects and filters, fancy typography, drawings, layering, or even background haircutting, Photoshop has it all. Although the program is paid, the results are well worth the cost.
Here is how to remove background hair Photoshop:
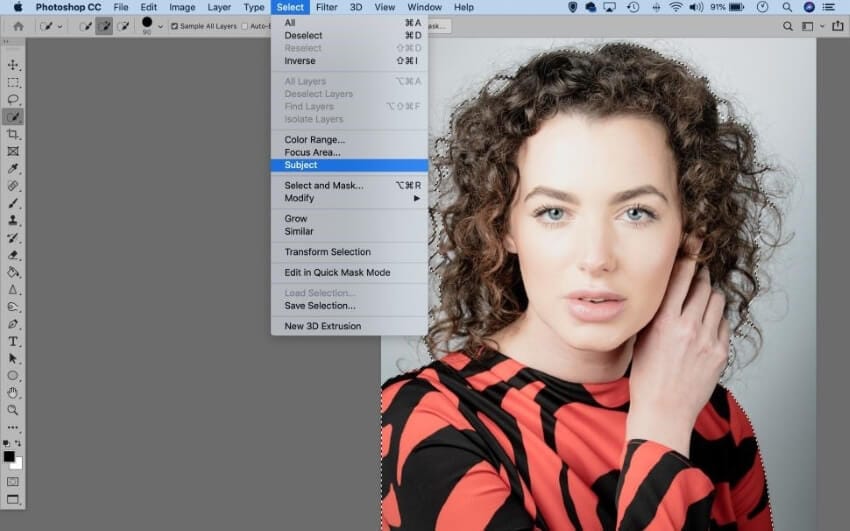
Step 1:
Import your image to Photoshop's interface. Go to the "Select" tab and choose "Subject." This way, Photoshop will automatically outline the main subject of the image. You can refine this selection by grabbing the "Quick Selection" tool from the left toolbar. Hold "Alt" and "Paint" to remove unwanted parts from the selection.
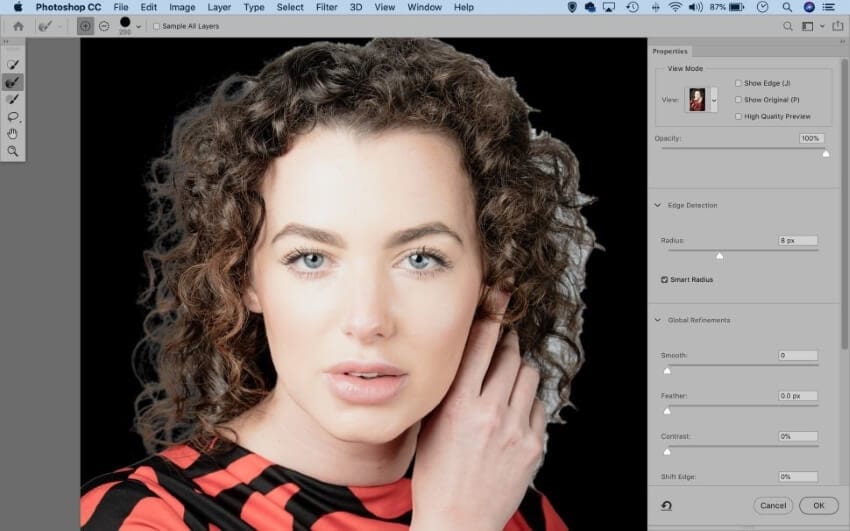
Step 2:
Now choose “Select and Mask“ from the Select tab. From the dialogue box, go to “View“ and choose a view that best portrays the contrast between the original background and the overlay. Now adjust the “Radius“ by moving the slider to increase refinement.
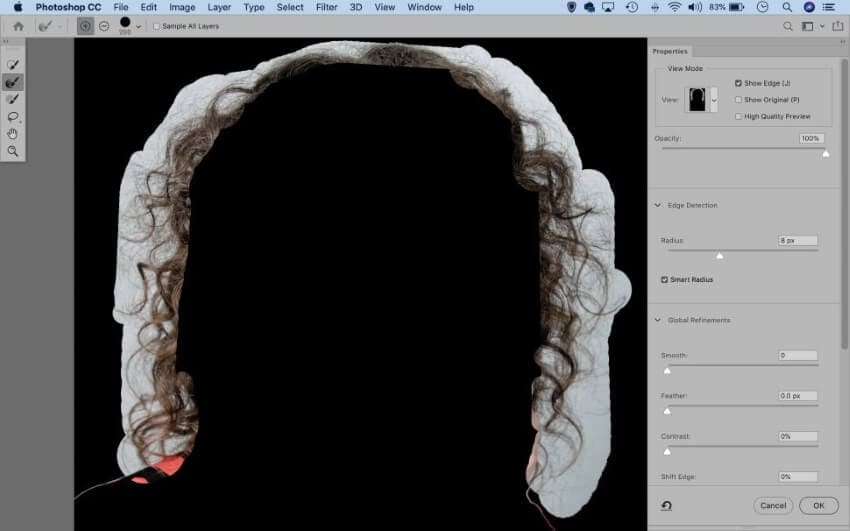
Step 3:
From the left, select the “Refine Edge Brush“ tool and paint over the edges. Ensure that all the rough areas are covered. You can check the "Show Edge“ box to know if you have left out any part.
Step 4:
Scroll down in the dialogue box and find the Output Settings. Choose Output to “Layer Mask“ and hit OK.
Step 5:
You can now move the cutout from a transparent background to a background of your choice using the “Move“ tool.
Step 6:
To get rid of the messy edges, go to the "Window" tab and select "Layers" from the dropdown menu. From the dialogue box that pops up, find the Layer Mask (it's the one where the subject and backdrop are visible in black and white). Right-click and hit "Select and Mask."

Step 7:
From the Output Settings, check the box next to "Decontaminate Colors." You can decrease the amount if it gets too overwhelming. This will change your Output to "New Layer with Layer Mask." Click OK to apply.
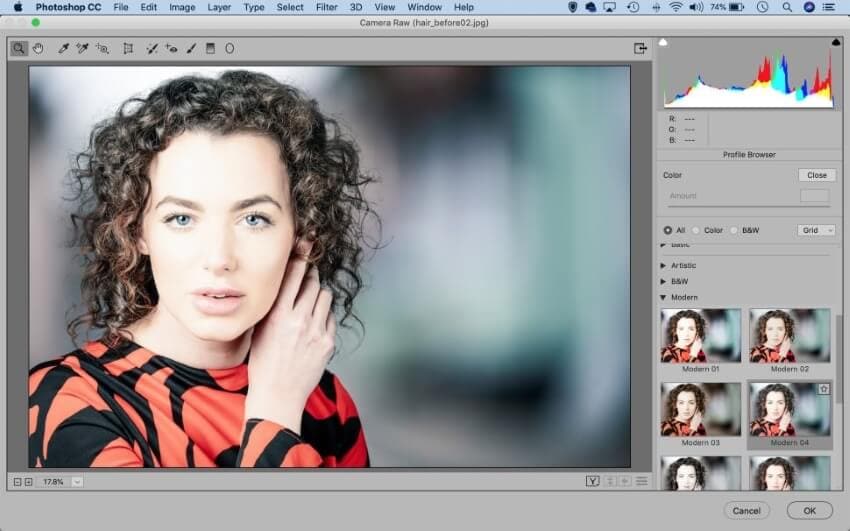
Step 8:
You can finish off with a tonal effect on top of everything by using the keyboard shortcut "Command/Control + Shift + Alt + E." This will merge all of your layers into one, and you can apply a tonal effect by going to the "Filter" tab and apply any filter such as the Camera Raw Filter. You can adjust the details from the control panel that opens on the right.
Part 2An Easier Approach to Cut Out Hair
If you feel like removing background from hair in Photoshop is not the right method for you, there is another method. PixCut by Wondershare is a prestigious tool that you can use for your background hair cutting needs.
PixCut is packed with numerous resources and powerful tools to help you get clean images according to your requirements. PixCut initially started as a web-based tool but has now launched applications for Desktop, Mac, and Android; and plugins for Shopify and Figma. It is an efficient tool to remove unwanted objects such as frizzy hair from your image background.
With its easy-to-use features and a beginner-friendly interface, PixCut is the best choice when it comes to online background remover tools or removing unnecessary objects from the image background. Here are a few simple steps indicating how you can remove background hair from the image using PixCut:
Step 1: Add Image
Open PixCut on your device and add your image to the program by clicking on the “Upload Image“ button.

Step 2: AI Removing Background
Using its AI tool, PixCut will automatically remove the image background.

Step 3: Open Editor
On the top right corner of the screen, you will see an “Edit“ icon. Tap on that and choose either the Standard or High quality to edit the image using PixCut‘s editor.

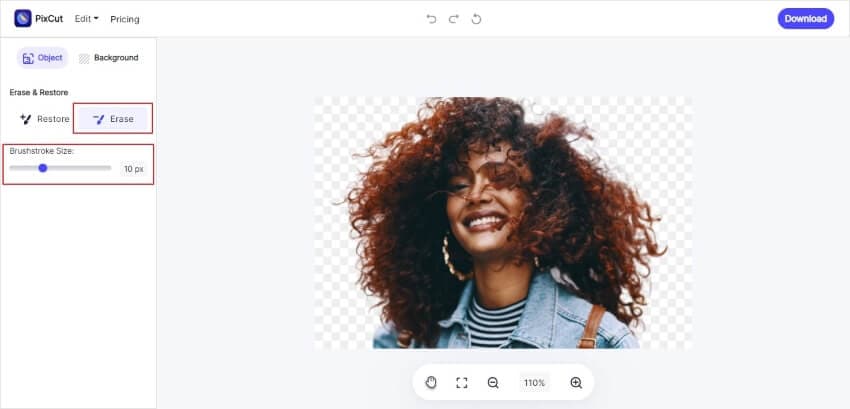
Step 4: Cut Out Hair
From the left panel, select the “Object“ icon, and using the brush tool, select the areas that you wish to erase from the image. You can change the brush stroke size and also zoom in for better detail. Select the parts with the unwanted hair, and PixCut will erase them.
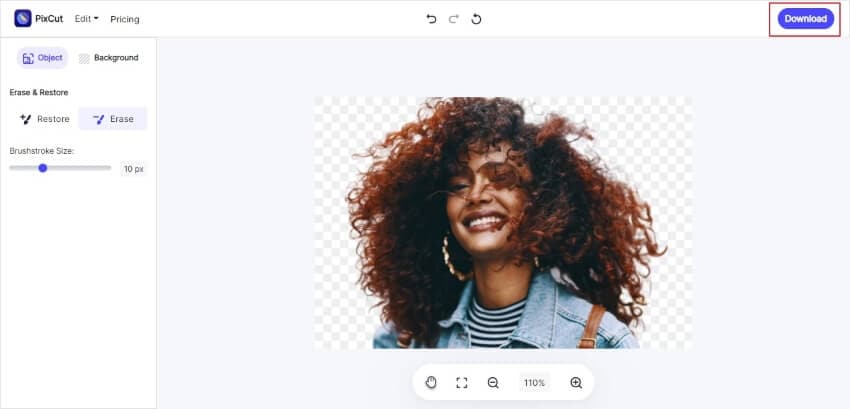
Step 5: Save to Device
Finally, click on the blue “Download“ button at the top right corner of the screen to save your image to the device.
Closing Words:A huge amount of effort goes into perfecting every aspect of an image and retaining it to the highest quality. While professional-level tools such as Photoshop can achieve the task seamlessly, they can still prove to be a bit challenging for some users. When minute details such as background hair cutting are concerned, the process requires attention and dedication.
Only competent tools can help you with the job at hand. Cutting hair in Photoshop might have its benefits, but PixCut provides a simpler way to achieve the same results. You can try both methods and decide what works best for you.