
Microsoft has been creating amazing apps to make it a seamless experience for its users. There is a bunch of pre-installed software that comes with Windows and I believe that there are some amazing, underrated apps.
One of the classic examples is Microsoft Paint. MS Paint is super underrated and gives you the creative freedom to edit images how you want. For instance, you can create images with transparent backgrounds in Paint. It takes slightly longer, but hey, you don't have to pay anything.
MS Paint received an upgrade when Windows 10 was launched in the form of a new app - Microsoft Paint 3D. Among many other features, you can create images in Paint 3D. You can use it to overlay images as well. In this tutorial, I'll guide you on how to overlay images with transparent background in Paint 3D which consist of 2 steps:
1. How to create a transparent background?
2. How to put it on another image of your choice?
Let's begin!
In this article
Overlay Images in Paint 3D
If you are still wondering how to overlay images in paint 3D, it is just a technical term used to put a paint PNG with transparent background image on another image. The process to overlay images in Paint 3D consists of 2 different parts as I mentioned earlier. Let's begin with the first one.
Part 1 How to Make Transparent Background in Paint 3D?
An image with transparent background has multiple use cases:
- They are visually appealing.
- You can put these images with anything - from a simple merchandise to your website/apps.
- You can use them as product images on eCommerce platforms like eBay, Amazon, etc.
When you are thinking of image overlays, image with transparent background becomes crucial because with a transparent background the overlapping of these images won't look natural.
I've created a guide with detailed steps on how to transparent background in Paint 3D.
Step 1:
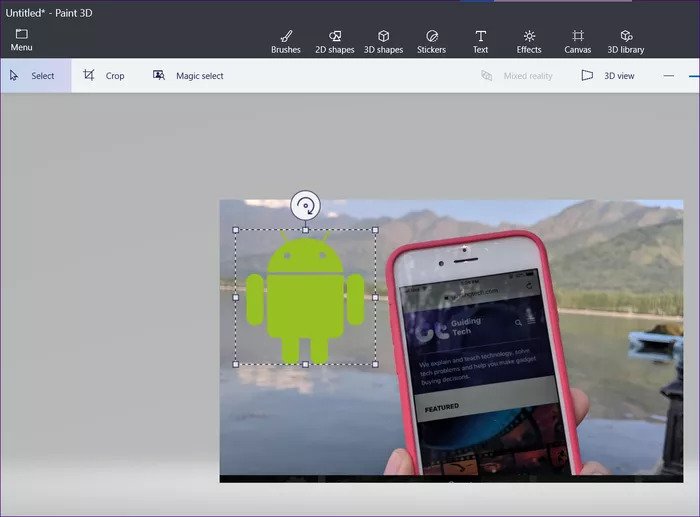
Open MS Paint 3D and open the image you want to edit. Choose the Magic Select tool. Minimize the size of the magic tool (covering your entire image) to cover only the relevant details of your image.
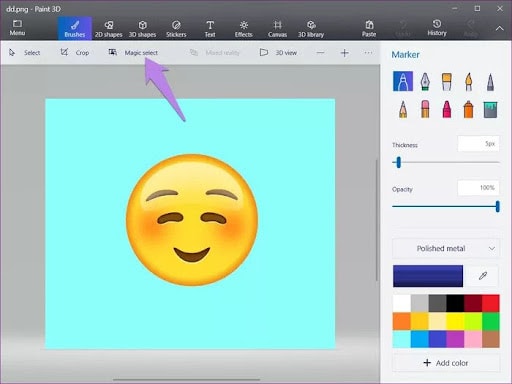
You can also follow the directions on the right hand side of the tool's screen to use the Magic Select tool properly.
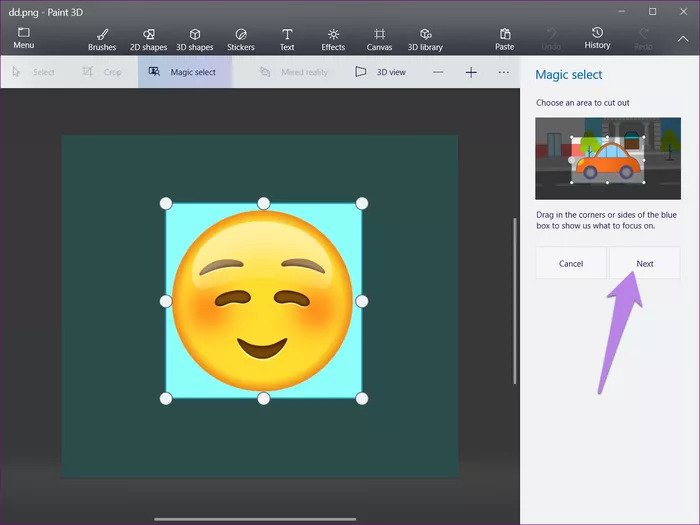
Step 2:
Once the relevant part of your image is selected, proceed to click on the "Next" button. Paint 3D will clear the area outside of the rectangle of the Magic Select tool.
Step 3:
The Magic Select tool of Paint 3D is not entirely accurate, especially with product images & portraits. Your image might be left with a couple of unnecessary elements. Choose the "Remove " option and use it to remove the unwanted elements from your image.

If you're satisfied with the results, hit "Done". What the Magic Select does is that it, in a way, detaches the main object from your entire image. Now you can use it as a separate element altogether to transparent background in Paint 3D
Step 4:
Drag and drop the object you detached using the Magic Tool outside its current background. Use the "Select" tool on the top left menu, hit the "Delete" key after choosing the non-transparent background.
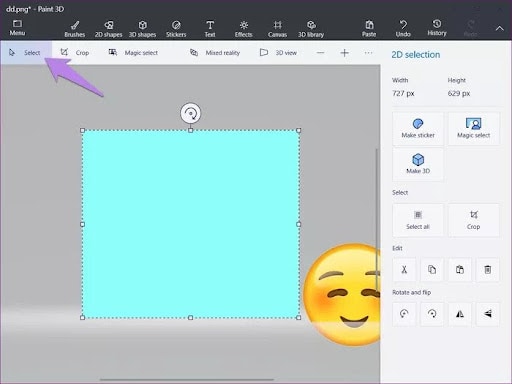
Save the object you've selected as a PNG image on your desktop. Make sure that you save it in the PNG format only else any and all kinds of transparency will be lost. Now you have completed the first of two steps of how to create image overlays in Paint 3D. Let's get to the next Part 2 of this tutorial.
Part 2 Put One Picture On Top Of Another In Paint 3D
Overlaying images in Paint 3D is simpler, yet not perfect. What you have to do is, open a background image and put the transparent image over it. Here's how to do it.
Step 1:
Open Paint 3D. Click on the "Menu" button and hit "Open" to open the image you want to use as background in this image overlay.
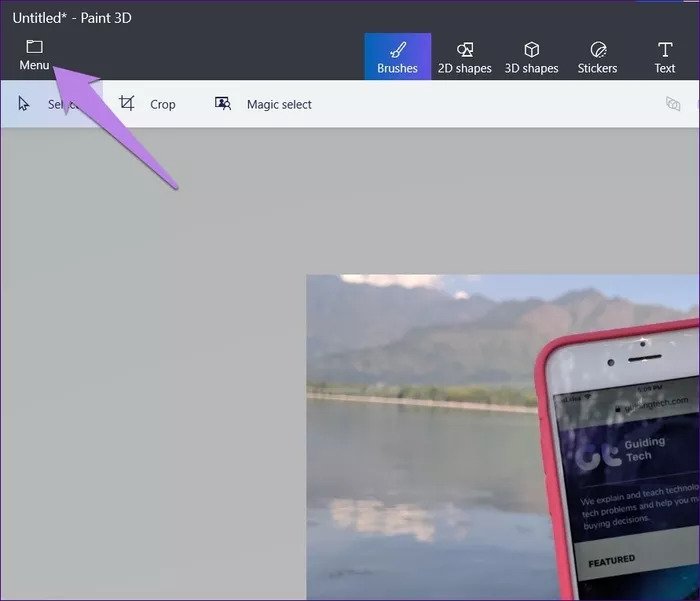
Step 2:
Click on the "Menu" button again and choose the "Insert" option. Choose the image you made transparent in Part 1.
Step 3:
Choose a suitable place for the transparent image. Edit - Resize/Rotate as much you want. Once you are satisfied with the final results, click on the "Save" button after clicking on the "Menu" button.
Note: You can add as many transparent images you want to the background image to make it more visually appealing or to get the desired results. The final image overlay should look something like this.
Creating a transparent background in Paint 3D, or even overlaying images, is easier than conventional methods like Paint but it has a lot of steps. You might deem the entire process to be unnecessary if you use tools like PixStudio.
I'll cover how to create a transparent background and overlay images in PixStudio in the next section.
Overlay images in PixStudio
Before I get into the steps of how to create transparent image in PixStudio, let me introduce you to the tool.
PixStudio is among the library of amazing, easy-to-use photo editing tools by Wondershare such as WonderShare PixCut, Online UniCoverter, etc. Wondershare PixStudio is a one-stop-shop for all your photo editing needs - be it for personal or professional use.
Here's a detailed guide on how to overlay images in Wondershare PixStudio.
Step 1:
Go to the official website of PixStudio and click on the "Start Design Now" button to get started.

Step 2:
Remember, you'll still need the transparent image before you can use it in an image overlay. Click on the "Remove Background" option that appears on the left side of your screen. It will take you to a different tool - Wondershare PixCut that is primarily made of creating transparent background.
Just upload your image. The AI of PixCut will do all the magic; you just have to save it.

Step 3:
Once you have your transparent image, let's get to the overlaying part. Click on the "Create a Design" button on the bottom left of your screen, choose a canvas size (equivalent to your background image).

You can also choose a size depending on where you plan to use the image overlay - for instance, Instagram post, Blog banner, etc.
Step 4:
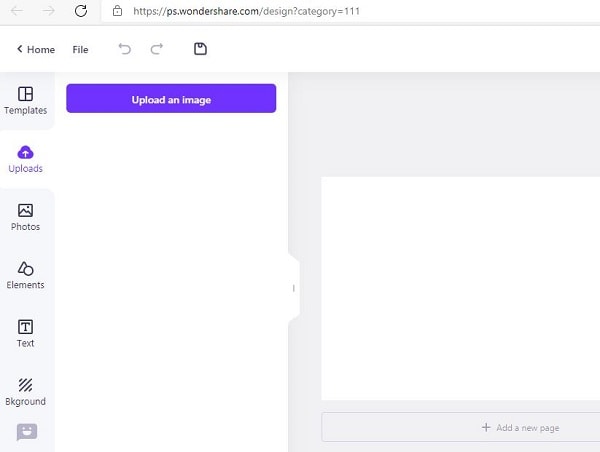
Click on the "Uploads" button, followed by the "Upload an Image", and choose both the background image & transparent image to be uploaded.
Step 5:
Just drag and drop the background image, followed by the transparent image, and save the final results.
And that's it. That's how easy it is to create amazing image overlays in PixStudio. The best part is how the makers have made it seamless to remove backgrounds (easy 2-3 step process) and even creating image overlays to be a 3 or 4-step process.
Over to you!:I hope that this guide on creating image overlays helped you in making background transparent in Paint 3D and creating amazing overlays. Windows Paint 3D is an amazing upgrade from MS Paint. Having said that, WonderShare PixStudio is the best - quickest & easiest option when it comes to creating great overlays - be it for your blog, IG handle or Youtube.
As I mentioned, it is one of the widely-popular tools out there individuals and businesses go to for their editing needs. So, what are you waiting for? Use Wondershare PixStudio to create amazing, visually appealing designs!