
In this article
Part 1 Learn Figma?
Launched in 2016, Figma has gained immense popularity as a collaborative designing tool in a relatively short time span. Whether you're a professional designer or stepping into the designing career, Figma can help you showcase your creativity and craft engaging designs, sketches, and vectors for different purposes. One of the major reasons why designers are switching to Figma from other popular designing tools is its cross-platform compatibility.
Unlike traditional designing tools like Sketch and Photoshop, Figma is a web-based designing tool that designers can directly run on their web browsers. Thanks to the web-based compatibility, Figma supports collaborative efforts, which means designers working in one team have the liberty to make changes to a design in real-time and speed up the entire designing process.
So, if you are also looking for a more versatile tool than Sketch, we recommend using Figma. In this article, we are going to share a detailed figma design tutorial on how to use Figma and its different features to create visually appealing designs with minimum hassle.
So, without any further ado, let's get started.
Part 2 Figma Beginners' tutorial
Before proceeding any further, we would like to point out that users can also import dedicated Sketch files into Figma and edit them further. However, once the editing process completes, you won't be able to export the design as a Sketch file. With that being cleared, let's start with the best figma tutorials that'll help you learn Figma to create stunning designs from different projects.
1.Set up your Figma account
The first step towards using Figma is to create a dedicated Figma account. Since Figma is an open-source editing tool, the signup process is pretty straightforward and it only takes a few minutes to set up your account. The tool also supports Gmail integration, which means you can also use your Google accounts credentials to create your account on Figma.

To create your account on Figma, go to https://www.figma.com/ and click the "Sign Up" button at the top-right corner. Here you can either select "Sign Up With Google" or enter new credentials to set up your account. Once the process completes, Figma will prompt you to its main editing panel where you can select different Once the account has been created successfully, you can move towards the next editing steps.
2.How to control the interface
One of the major reasons why designers prefer Figma over other editing tools is its easy-to-navigate user interface. Whether you're a beginner or an experienced designer, you won't find it challenging to navigate through the different features of Figma. Though Figma is also available as a standalone desktop application (both for Windows and macOS), the majority of users prefer its web-based version due to advanced applications. That's why we are going to discuss Figma tutorials that mainly revolve around its version.
Let's first start with how to create a new file in Figma.
Step 1
Sign in with Figma credentials to get started.
Step 2
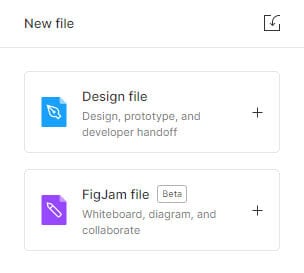
Once you're in Figma's dashboard, click the "Design File" button at the top-right corner.
Step 3
Figma will automatically create the new file and you'll be prompted to the editing panel where you can start working on your design.
3.Create Frames, Rectangles, and Text layers
Once you've created a design file in Figma, you can then proceed towards creating frames, rectangles, and text layers. Frames are basically container files that are used to add different elements to your design. You can create multiple container files for one design and use them to add different visual elements to your project.
Step 1
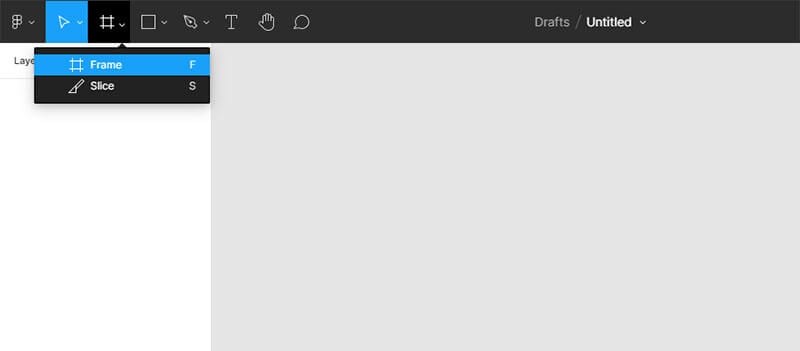
When it comes to creating a new frame in Figma, the process is pretty straightforward. All you have to do is tap the "Frame" button. Alternatively, you can also press the ‘F' button to add a new frame.
Step 2
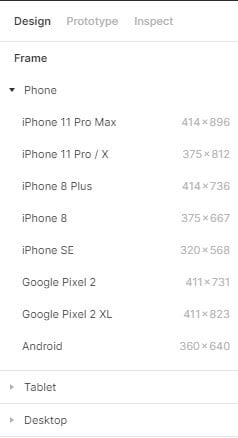
You'll be asked to set the properties of the frame. At this point, you can either choose one of the built-in templates or switch to the "Inspect" tab to create a custom frame. Figma provides frames for all the popular devices including iPhone, Android, and tablets.
Step 3
After choosing the template or setting custom parameters, you'll see the frame on your screen.
Add Rectangle
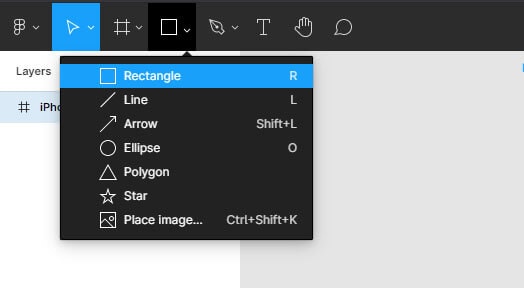
The next step in our Figma tutorial for beginners is to add different elements to your design. You can start by adding a rectangle. To add the rectangle, click the "Rectangle" icon in Figma's toolbar. A drop-down menu will appear on your screen. Here you can also select other shapes and objects such as lines, arrows, eclipse, etc. Since we want to add the rectangle, select the first option from the list.
Then, bring the cursor to the frame, and drag the pointer to draw a rectangle. Like any other designing tool, you can change the position of the rectangle or resize it instantly. You'll also see a dedicated editing panel on the right corner of the screen. Here you can adjust different parameters (like coordinates and position) of the selected rectangle.
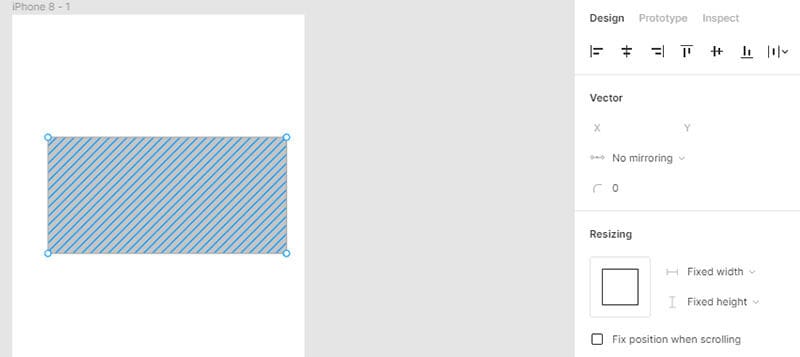
It's worth noting that Figma offers complete customization, which means you'll be able to add as many elements as you want and adjust their properties to match your design's style. All the rectangles (and other objects) that you add to your project will appear on the left side as separate layers, allowing users to switch between all the elements easily.
Add Text
In addition to objects, you can also add dedicated text layers to your project to make it look more appealing. Ideally, designers add text fields while creating forms or adding a dedicated text button. Like the rectangle, you can add as many text layers as you want and customize their properties easily. Let's quickly take a look at how to add a text layer in Sigma.
Step 1
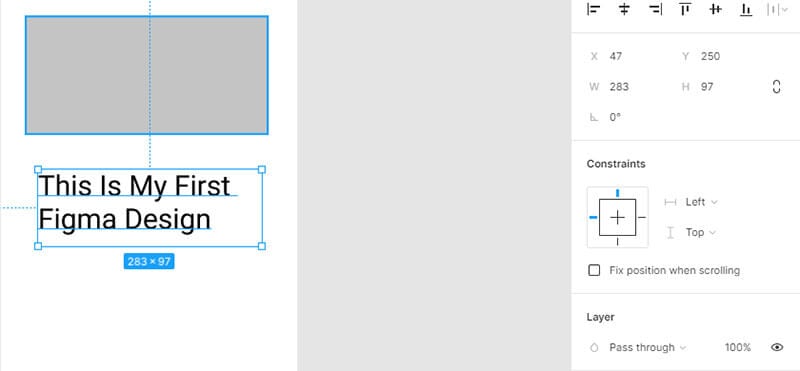
Press "T" on your keyboard or click the "Text" layer icon in the toolbar. Then, drag the pointer anywhere inside the frame to draw the text layer.
Step 2
Next, type the text that you want to add. Once you have added the text, you can use the right side menu bar to adjust its properties including alignment, position, and size.
4.Importing Photographs in Figma
When you want to learn Figma, you must also know how to import pictures into your project. Why? Because images make the overall design more appealing and draw the user's attention. To add an image in Figma, you can click the "File" icon and then select "Figma>Place Image".
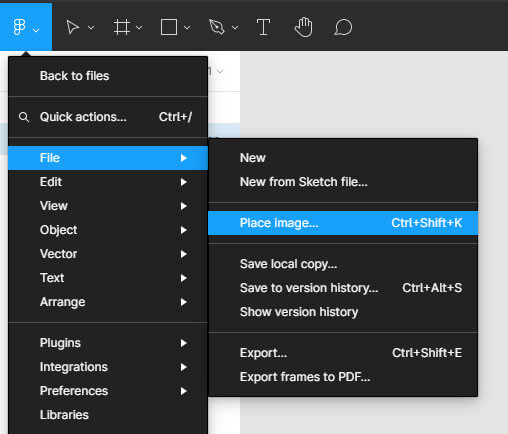
The File Explorer window will appear on your screen. Here select the image that you want to add and click "OK". You can also press "Ctrl+Shift+K" to add an image to your design. After you've added the image, you can change its position, resize it, and even remove its background.
5.Remove Background of an Image using PixCut in Figma
Users are offered an option of utilizing the plugin of Wondershare PixCut for removing the image background. With the PixCut plugin accessed across Figma, users can easily remove their images’ backgrounds. This can be done for free across 60 images.
Users will get crisp quality with original image size after using this easy-accessible plugin. The plugin needs to be added within the menu from where it is both accessible and usable. Wondershare PixCut offers a very unique and diverse set of features to its users. Different APIs are available across the plugin for use while providing quick AI technology for removing backgrounds.
The following explains the step-by-step process of removing the background of an image using Wondershare PixCut plugin.
Step 1
Access this link to install your PixCut plugin across your browser. The Wondershare PixCut plugin will be installed across your Figma account.

Step 2
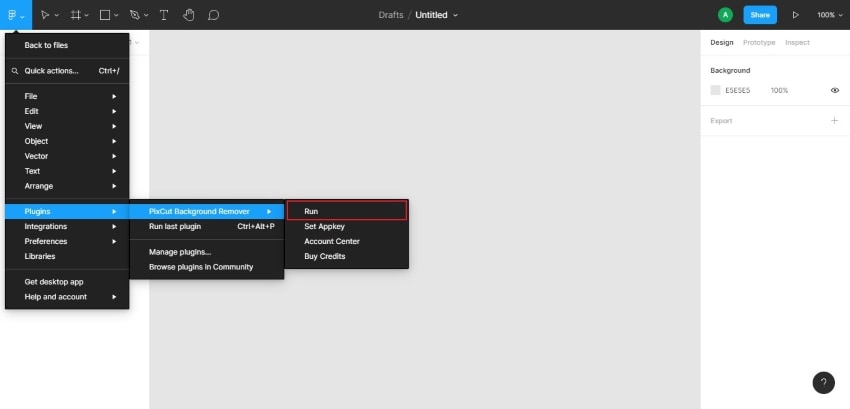
Open a new design file across Figma and tap on the ‘File’ icon present on the top-left corner of the screen. Navigate to the ‘Plugin’ section and tap on ‘Run’ across the PixCut plugin.
Step 3
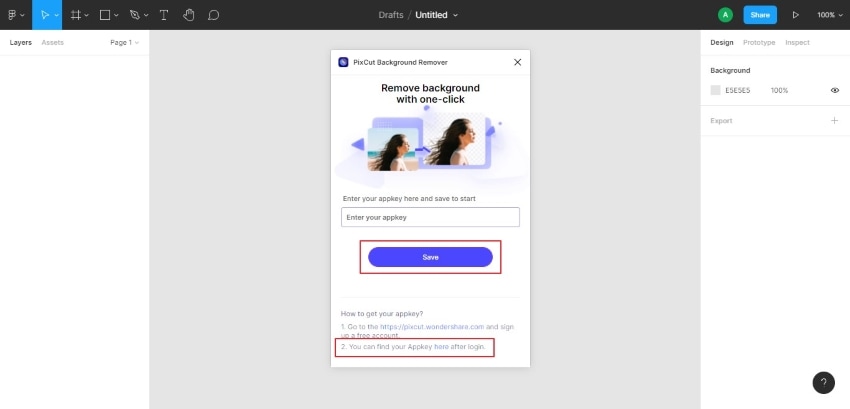
A new screen opens on the screen, which demands the appkey for the plugin. Tap on the link provided below to access your PixCut account for copying the appkey. Paste your appkey across the blank space and tap ‘Save.’
Step 4
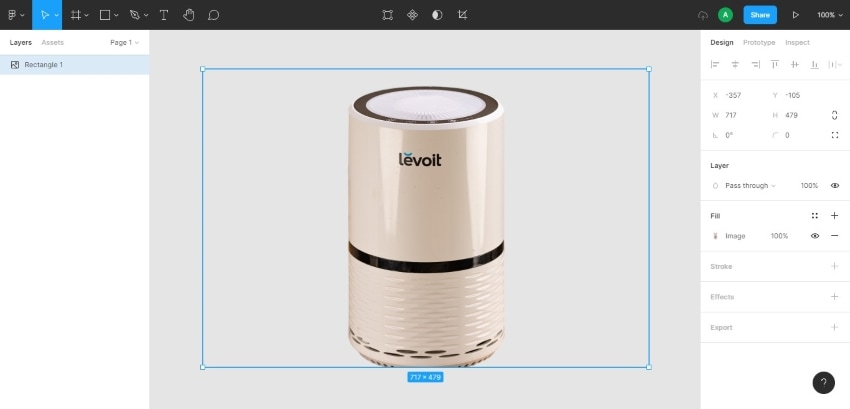
Following this, select the image that requires its background removed. After selecting the image on the design file, access the ‘File’ icon again and tap on ‘Run’ after navigating across the ‘Plugin’ section to successfully run the background removal tool of PixCut. The background of the image will be successfully removed.
6.Adjust typography
As we mentioned earlier, Figma offers a fully functional editing panel where you can adjust all the text properties. All you have to do is add a dedicated text layer in your design and use the right-side toolbar to adjust different elements of the text. Here you can change alignment, Font, size, etc., and customize the text to match your overall design.
Part 3 People also ask about Figma
So, that concludes our detailed Figma tutorial for beginners. Whether you are switching from a different editing software or choosing Figma as your first editing tool, the above-mentioned tips will help you get started. So, let's end this guide by addressing some of the most commonly asked questions about Figma.
1.Is Figma 2021 Available for Free?
Yes, Figma is an open-source cross-platform editing tool that's available for free. Being a browser-based editing tool, users have the liberty to run Figma on any device they want and use it to create visually appealing designs without paying even a single penny. However, if you are a professional designer, you can also buy Figma's premium version and unlock advanced features.
2.Is It Possible to Collaborate With My Teammates With the Free Version?
Team collaboration is one of the major benefits of switching to Figma. However, you can only create a team of up to two people under the free version. If you want to add more team members and work on a design in real-time, you'll have to buy the paid version of the application.
3.Can I Still Use Figma's Education Plan in 2021?
Yes, students and educators can still use Figma's education plan and access the majority of its features for free. To do this, however, you'll first have to verify your details at Figma's official website and start your education plan.