
Anybody can steal your photos and use them for their benefit. Therefore, you need to make sure that all your images are watermarked.
However, software like Photoshop is not everyone’s cup of tea when it comes to imposing a watermark on the visuals. So, if you’re curious to know how to add a watermark.
Or in other words, how to put a watermark on your photo without using Photoshop, here are various methods you can follow and apply to protect your hard work from the stealers.
In this article
Part 1: What is Watermark and Its Types?
A watermark is a signature in the form of text or image added intentionally to a photo to create difficulty copying the original picture without the owner’s permission.
Common Types of Watermark
While a watermark could be anything that assures copyright protection, the two widely used watermarking types are text and logo.
Text Watermark
Any written material superimposed to any image is called a text watermark. Using different fonts, styles, colors, and sizes, you can make this watermark with or without experts' help.
Logo Watermark
A logo watermark is any individual’s or company’s symbol pasted atop any image to secure its rights. However, to create your own logo, you do need professional assistance.
Part 2: Method #1 – Adding Watermark on a Photo using Your PC
MS Paint
If you’re a PC user and prefer to use a built-in program to add a watermark on a photo, then let MS Paint do the job. Nevertheless, you can only add a text watermark to your images with this software.
Here’s how you do it.
Step 1: Import Your Image in MS Paint
Open the MS Paint program on your PC. Click on the “File” menu button, and click the “Open” option to choose an image you want to import from your computer’s directory.

Step 2: Type Your Text Watermark
After importing the image, click on the “Text” button. Click anywhere on the photo and start typing the text watermark on the image.

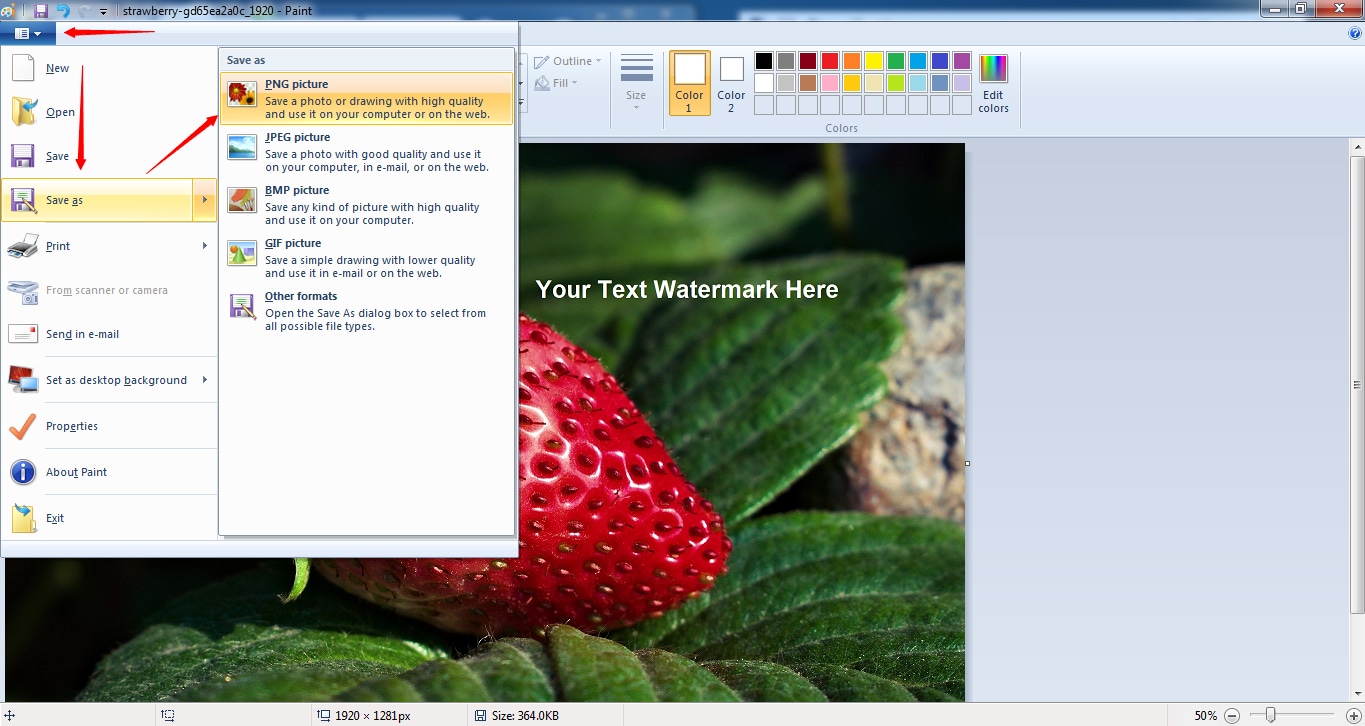
Step 3: ‘Save As’ Your Text Watermark
If you’re satisfied with your text watermark, it is time to save it on your desktop. To do so, click on the “File” menu button, then hover your cursor on the “Save As” option, and choose the image format, such as PNG or JPEG.
PhotoWorks
If you’re searching for reliable and easy photo editing software to add watermarks to images, you can try PhotoWorks. The software has great features and tools, which can help you create text and logo watermarks within a few minutes.
Step 1: Download PhotoWorks
PhotoWorks is a paid tool but you can enjoy the free trial by downloading the software from the official website.
Step 2: Adding Watermark to Photo
To add a text watermark on your photo, here’s what you need to do:
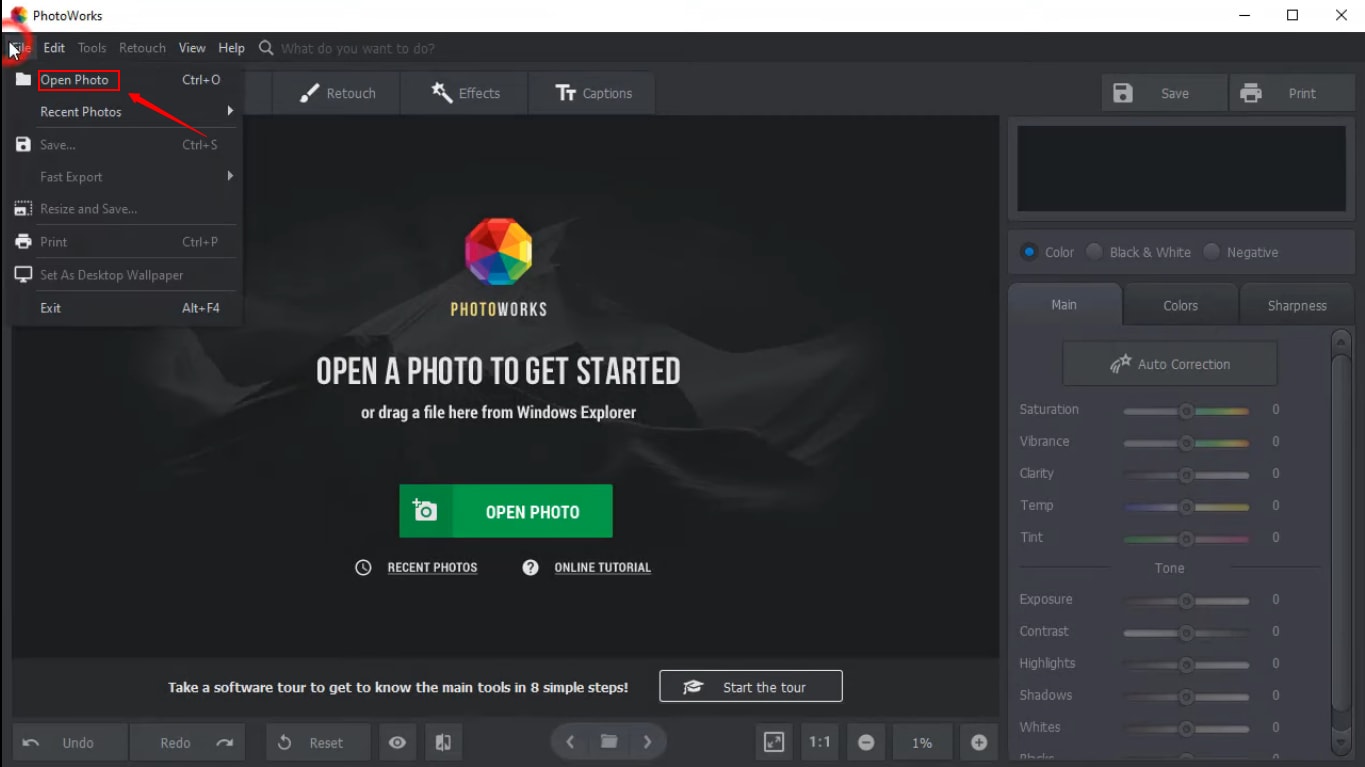
Click on the “File” option from the menu and open your photo in PhotoWorks.
Click on the “Captions” tab and then click the “Add Text” button to type your text.
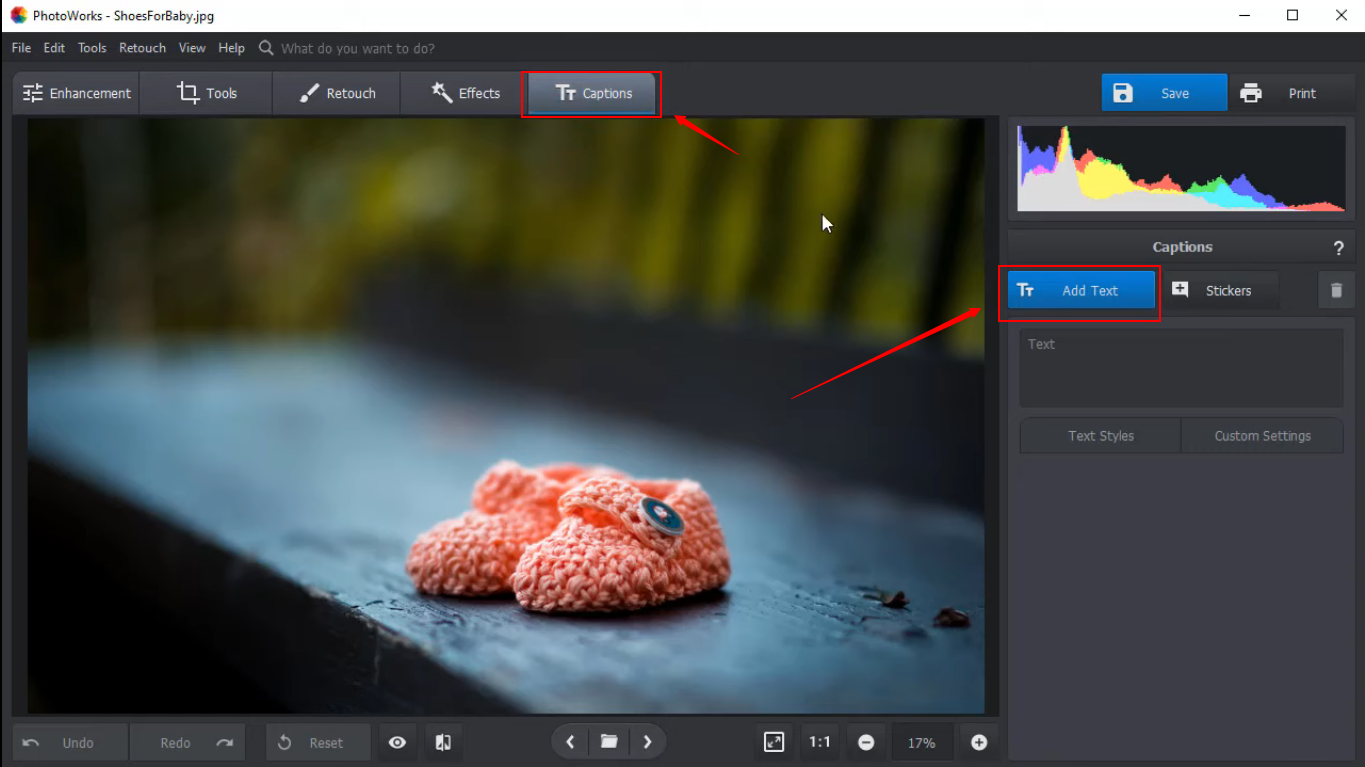
Choose your “Text Style” and drag-and-drop the watermark in a suitable position.

Follow these steps to add a logo watermark on the image:
Open the photo in the program, and click on the “Tools” tab, and select the “Image Overlay” option.

Then, click on the “Add Image from file” to choose the logo from your PC’s folder.

Once you’re done, feel free to play with the positions and filters.
Part 3: Method # 2 – Adding Watermark on a Photo using Your MAC
BatchPhoto Pro
The BacthPhoto Pro allows you to add a watermark on multiple photos using your MAC. This is one of the reasons why BatchPhoto Pro is adored in the eCommerce industry, as it saves great time, which is mostly wasted on watermarking one image at a time.
Although it’s a paid program, you can still download the trial version to create watermarked photos. Besides, the software is also available for PC users. However, it performs ideally on MAC systems.
Follow these steps to add a watermark with BatchPhoto Pro.
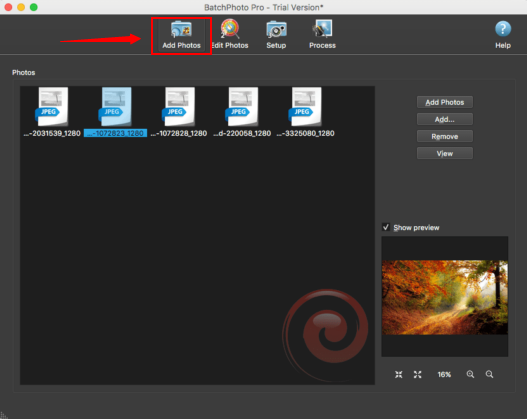
Step 1: Add Your Photo in BatchPhoto Pro
After installing BatchPhoto Pro, open the application and go to the “Add Photos” option to import all the images (you can also import a single image to watermark it).
Step 2: Add Watermark Text and Logo
Once you have imported your images, click on the “Edit Photos” option, select “Add Filters,” and click on “Watermark Text” to type and create a text watermark.
Similarly, if you want to add a logo, select the “Water Logo” option next to Watermark Text to import and impose a logo watermark on your images.
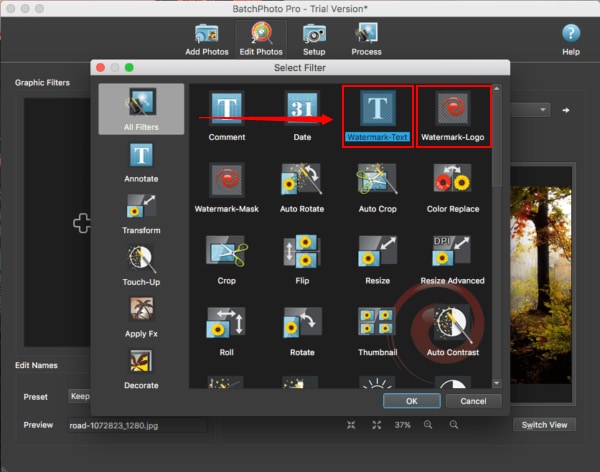
Feel free to play with the adjustments and click on the “OK” button.
Step 3: Process Your Photo
You will see a setup page after clicking the “OK” button. From there, select your output folder and format from the output menu.

Now, click on the “Process” button to command software to begin adding text or logo watermarks to all your images. All the watermarked images will be saved in your output folder.
Preview
Preview is a built-in application in mac operating systems, which helps users view images. You can use this program to add text watermarks to your photos for free.
Here’s how you can do it:
Step 1: Open Your Photo with Preview
Open the image with Preview software and click on the “Show Markup Tool.” Then, click on the “T” icon to add a text box to your photo.

Step 2: Add Watermark Text and Save the Photo
Type your watermark text, adjust the size, and font style until it pleases you.

You can also reposition the text by dragging the text box to make sure your watermark is visible.
At last, go to the “File” option and click “Save” to have a watermarked photo.
Part 4: Method # 3 – Adding Watermark on a Photo with Online Watermarking Software
Water Marquee
Water Marquee is online watermarking software that allows you to add text and logo watermarks to your photos. The software is free to use, but you can unlock more features by purchasing the program.
Step 1: Add Image
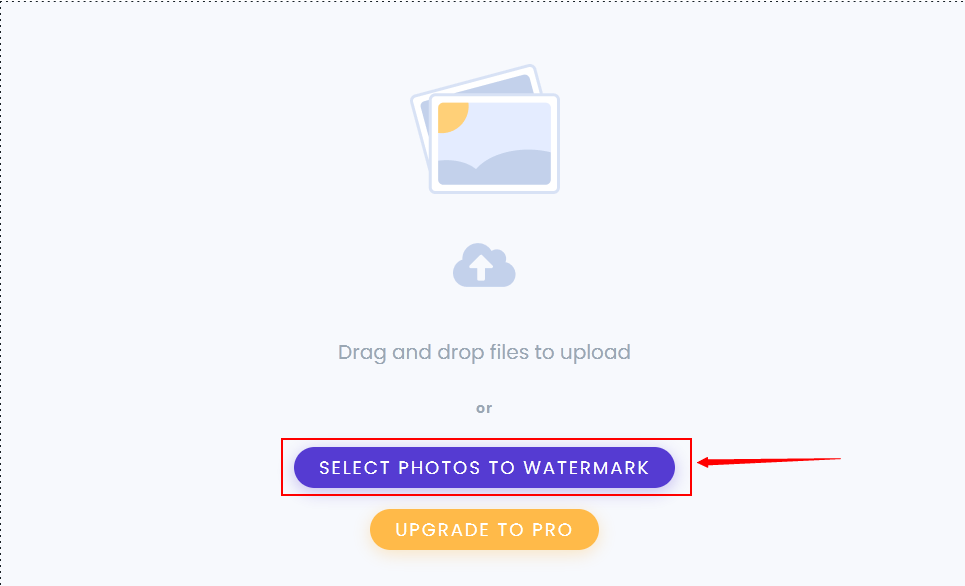
Visit the Water Marquee website.

And click on the “Select Photos to Watermark” button to add the photo.
Step 2: Import Logo
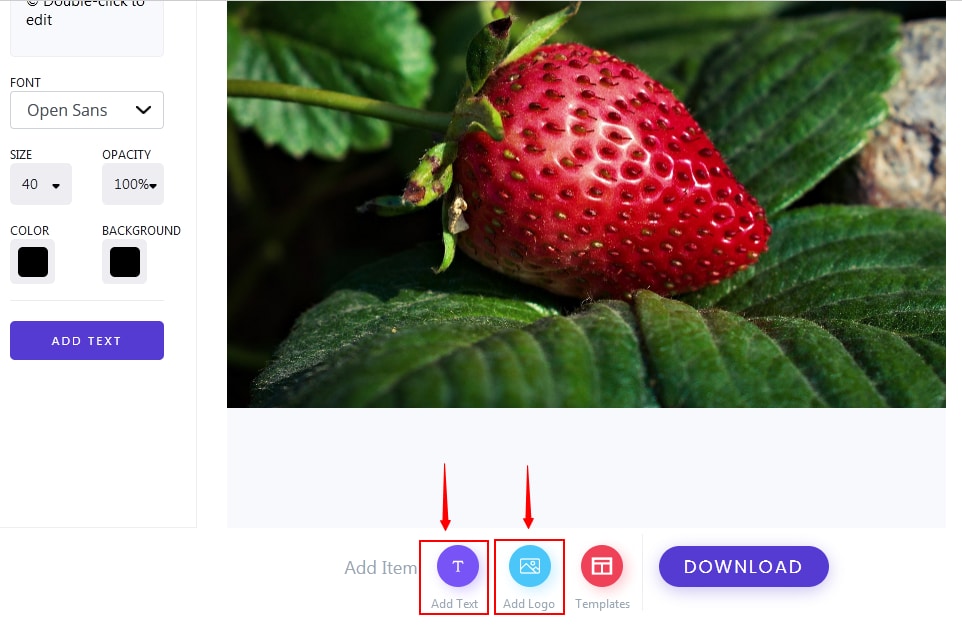
Now, select “Add Text” to add text watermark, or “Add Logo” to include logo watermark on the image.
So, if you want to add a logo watermark, click on the “Add Logo” button.
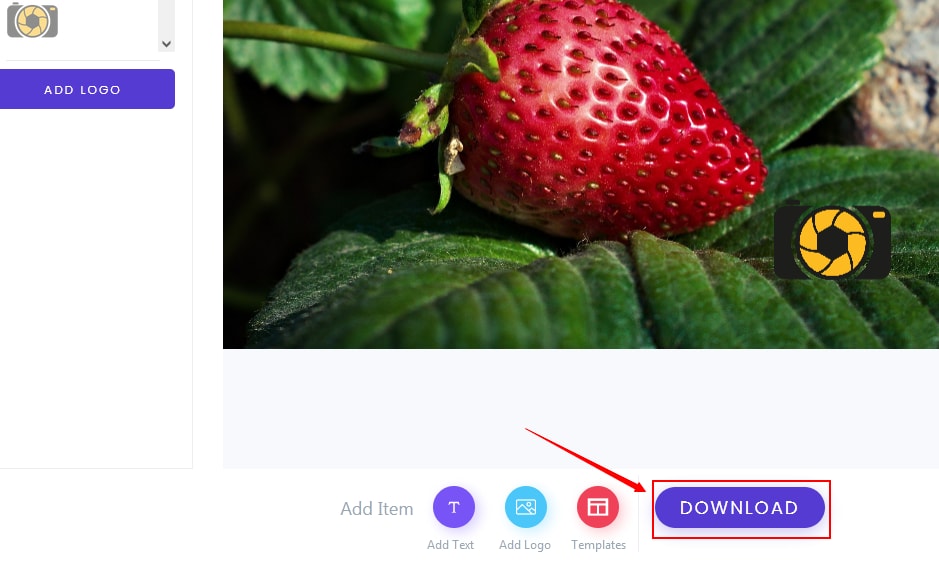
Step 3: Place Watermark and Download Your Image
Drag and drop the logo on the image.

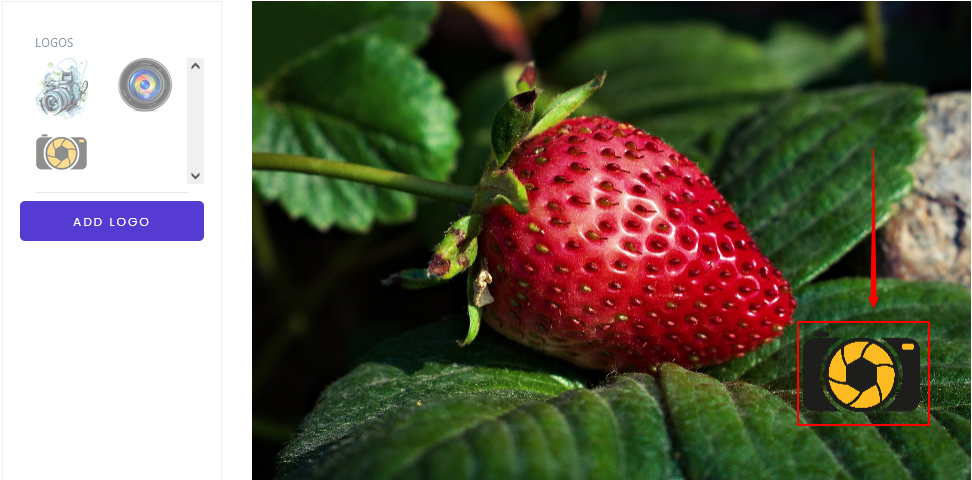
Then, click on the “Download” button to save your watermark photo in a Zip file.
Watermark.ws
Watermark.ws is a professional online tool for watermarking, re-touching, and resizing images and videos. It has a user-friendly interface with various beneficial options, especially when it comes to watermarking.
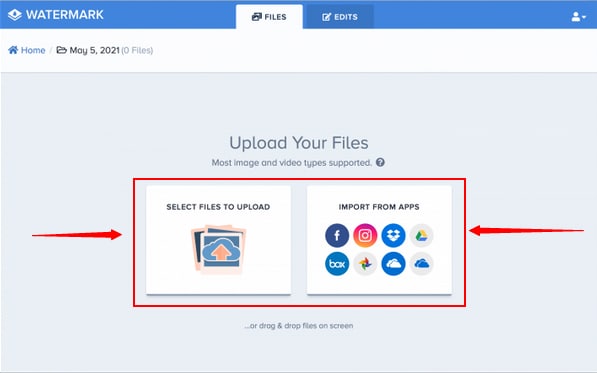
Step 1: Import Your Photo
Upload images from your computer, or import files directly from Facebook, Dropbox, or any other supported platforms.
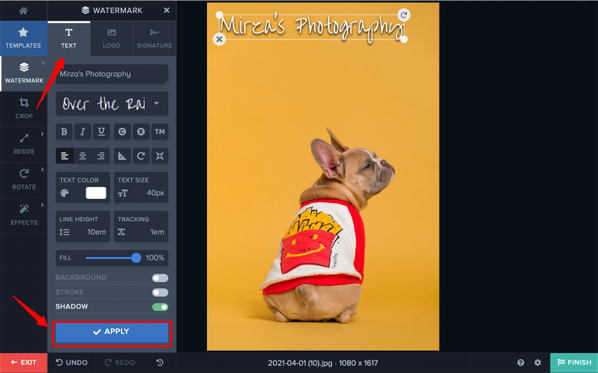
Step 2: Create or Add Your Watermark
If you have a logo to use as a watermark, simply add it by clicking the “Logo” tab. In case, you want to create your own text watermark, click on the “Text Watermark” tool and type your watermark.
Once you are done with your watermark editing, click on the “Apply” button to proceed.
Step 3: Download Your Watermarked Photo
When you are satisfied with the complete image, click on the “Finish” button to download the photo to your computer. You can also “Export” the image directly to any other platform, like your Dropbox or Facebook account.

Part 5: Method # 4 – Adding Watermark on a Photo with Mobile Apps
Salt Watermark
Salt Watermark is a paid Android-based watermarking application for branding and protecting photographs and videos. You can add several text and logo watermarks and also resize and crop files using your smartphone.
Step 1: Add Your Photo
Download Salt Watermark and open the application. Once you’re in the app, tap on the “Gallery” option to upload your photo.

Step 2: Create and Add Watermark on Your Photo
If you don’t have a logo to add as a watermark on the photo, you can type and create a text watermark by selecting the “Text” option from the bottom menu.

And in case you have a logo, you can choose the “Logos” option from the menu bar to select the logo image you want to add as a watermark on the photo.

Step 3: Save Your File
If you’re glad about your creation, tap on the “Download” button with an arrow icon to save your watermark photo in your phone gallery.
eZy Watermark Photos Lite
eZy Watermark Photos Lite is free to download on your Android or iOS smartphones. It is an efficient and reliable app for watermarking photos with text and logos.
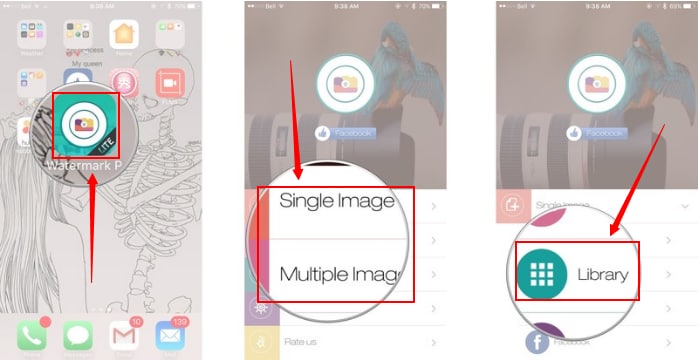
Step 1: Add Your Image
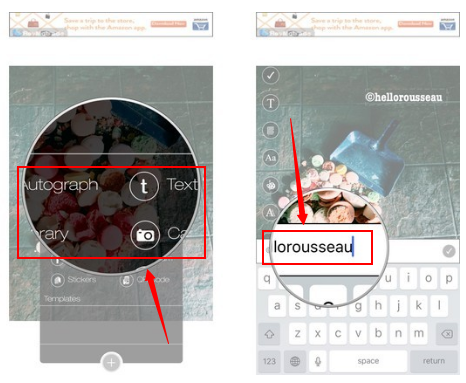
Download and run the eZy Watermark lite mobile app and select the “Single Image” or “Multiple Images” option. Then, choose the source of the photo you want to watermark.
Step 2: Add Logo or Type Text
After adding the photo, choose “Gallery” from the options to import the logo on the photo, and feel free to adjust its position and size. In case you want to add a text watermark, select the “Text” option to type the text.
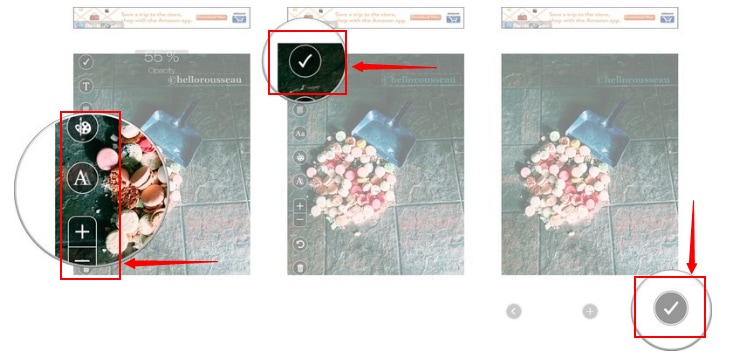
Step 3: Edit and Save
You can change the font, opacity, and more on your watermark by tapping the editing tools on the left side of the screen. And if you’re happy with your watermarked photo, tap on the “checkmark” icon on the left-side of the screen.
Now, save the photo by tapping the “checkmark” icon again on the lower right corner of the screen.
Part 6: How to Remove Watermark from Photos to Use Your Own Watermark?
Adding a watermark on a photo is easy as compared to removing it. Many mainstream software fails to completely eliminate a watermark from an image. On the other hand, using Photoshop for watermark removal requires professional skills and the process is also time-consuming.
But guess what? You can use PixCut to remove watermark from your photos. PixCut is another useful tool by Wondershare to remove photo backgrounds and watermarks with 100% Artificial Intelligence. The best part is that the method is quick and effortless. Moreover, the results are extraordinarily mind-blowing.
And if you still doubt it? Here’s a short demonstration of how PixCut works when it comes to removing watermarks to prove the software is a real bliss.
Step 1: Upload Your Watermarked Photo
Go to the PixCut website. Scroll down to see the “Watermark Remove” feature and click on the “Try it now” button.

Click on the “Upload Image” option to import the watermarked photo so you can begin the removal process.

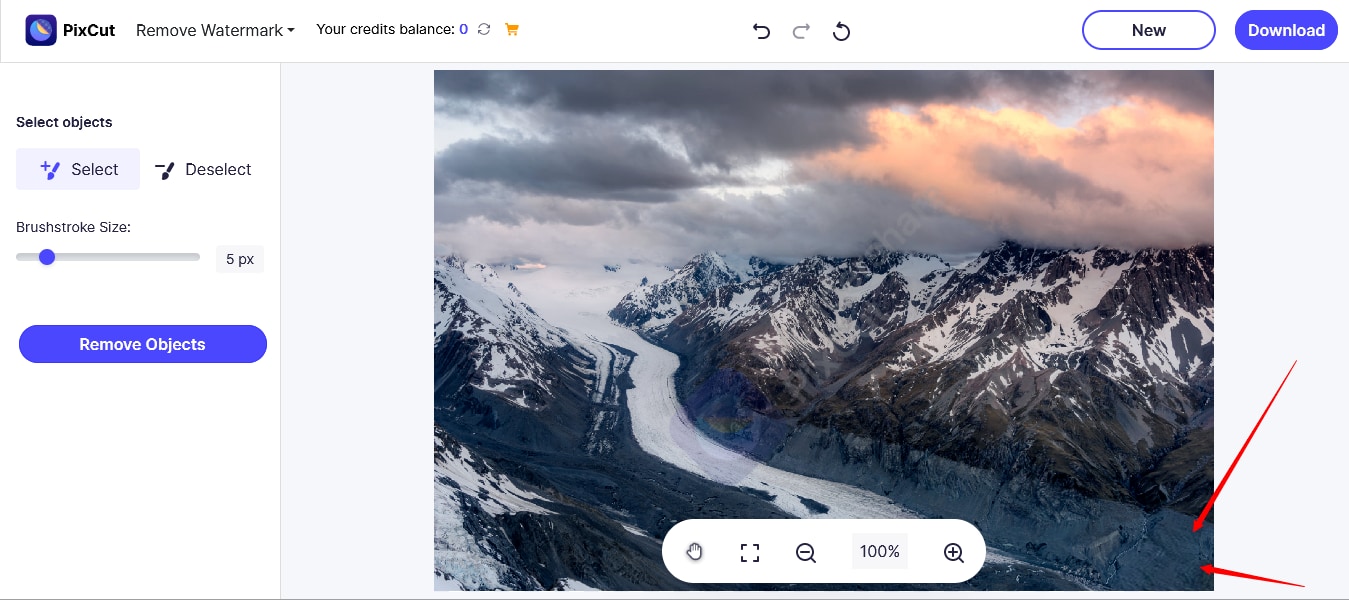
Step 2: Remove Watermark from the Photo
Click the “Select” button to turn your cursor into an object-removing brush tool. You can also adjust the brush stroke size according to the size of the watermark.
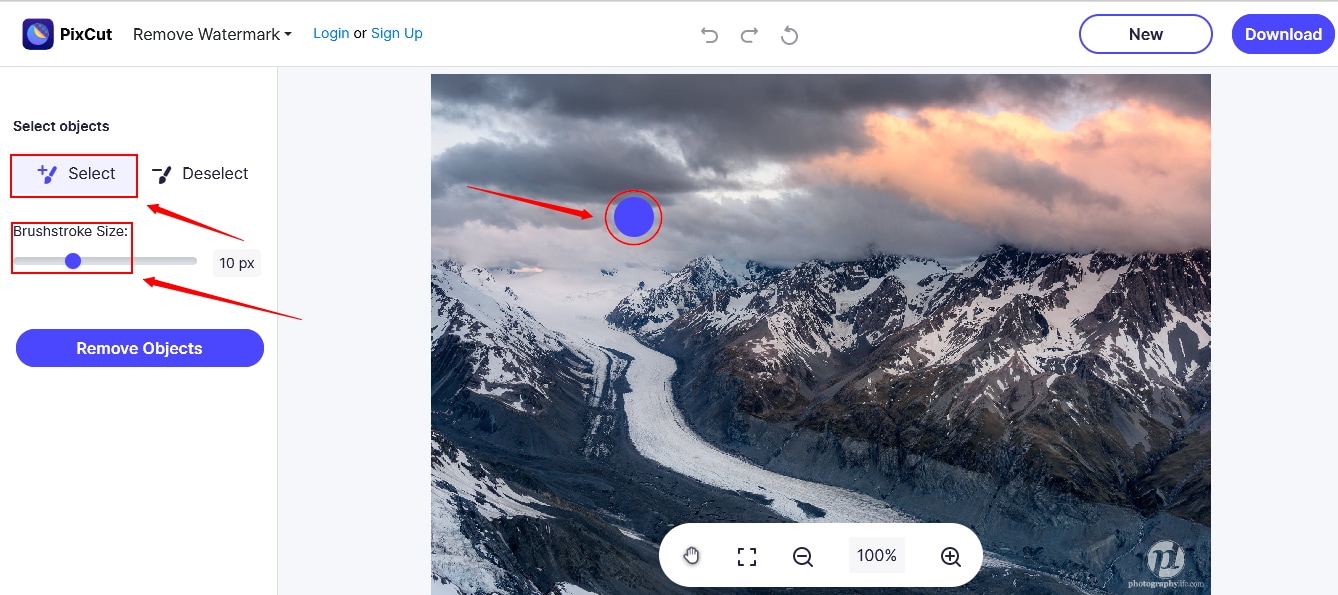
Carefully move the cursor on the watermark and make a clean selection.

Now, click on the “Remove Object” button to see the magic.
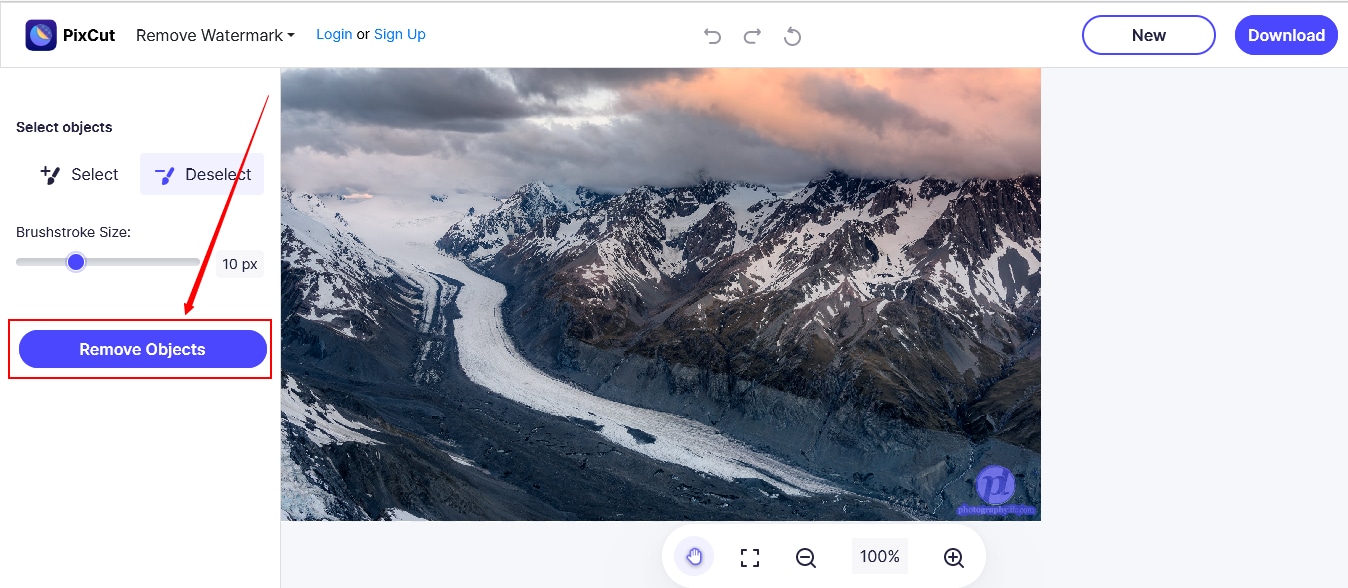
Ta da! No signs of watermark.
PixCut is the perfect online software to remove any type of watermark without scratching your head.
Note: You need to sign up and log in to remove the object/watermark from your photo. Furthermore, you are required to purchase the software to download the image to your device.
Part 7: Bottom Line
Are you still wondering how to add a watermark on your image without using complicated and complex software? Well! It is possible if you have the right tools.
So, if you want to know how to put a watermark on a photo without Photoshop, you can follow different step-by-step methods to include text and logo watermarks with the help of your PC, Mac, and smartphones without a hitch. To make sure the next time you share your photos online, they are completely protected from the stealers.
People Also Ask
How can I add a watermark to my photos without Photoshop?
You can add a watermark to your photos by using free and paid watermarking software, online programs, and mobile applications. These tools are simple and user-friendly as compared to Photoshop.
How can I make my own watermark?
It depends on the software you are using. Many watermarking software permits you to create your own text watermark with the help of different fonts and styles. If you wish to add a logo watermark to your photo, you need to design it first and import it on the software to add to your photo as a watermark.
How can I add a watermark to my photo for free?
There are many PC and macOS watermarking software and online tools, which help you add a watermark to your photo without any charges. You can also use the trial version of paid software to put a watermark on your photos without Photoshop.
What mobile app can I use to watermark?
Some of the best mobile apps for watermarking your photos are Salt Watermark and eZy Watermark Photos Lite.