
Most people love keeping prints of images for remembrance because they are attractive. Also, when it comes to memories, digital photos disappear from one's mind after a while.
People often forget some of the most important memories in life. Therefore, you should print images that are sentimental to you.
This guide will teach you how to enlarge an image to print. We will go through some of the basic requirements for printing an image and the best tools that can help you enlarge images before printing.
Basic Requirements for Printing an Image
There are several factors that you need to consider when you want to print an image. For starters, it all comes down to the quality of the photo that you are using. Quality comes first if you wish to avoid problems encountered when printing images.
Essentially, the quality of an image can be defined by the following aspects:
DPI
The term DPI is also known as dots per inch; this measurement shows the following.
- The total number of dots that a digital image has. Most common images found on the web have at least 72 DPI. However, this is not the bare minimum required to produce a good quality print. Whenever you want to print an image, check to confirm the DPI and ensure it is not less than 150.
- Any image with less DPI than 150 is likely to give you a poor-quality image. The total amount of DPI will determine the amount of ink you need to print a quality photo. Also, ensure the printing machine that you use can print images with at least 300 SPI.
Pixels are affected by altering the size of a bitmap. If you are keen enough when enlarging an image, you will see each pixel with your eye. Luckily, you can now eliminate the pixelation problem with an online tool.
To learn how to enlarge an image to print, you must first check its resolution. This is determined by the number of pixels. An image with a high number of pixels is likely to remain unaffected by enlarging. Therefore, put in mind the resolution of the image before you decide to enlarge an image.
How To Enlarge an Image to Print
Knowing how to enlarge an image to print can come in handy when you want to hold on to a picture as a memory. What's more? You enlarge a photo for the following reasons:
- To use it as a wall art
- To use it as posters
Below are some things that you should pay attention to when trying to enlarge an image to print.
When it comes to enlarging a picture for printing, you should prepare the images appropriately. You can consider factors such as color profiles, ratio, and file formats. One of the main benefits of considering these factors is to ensure that its contents remain detailed.
Read on to find out about the steps you can follow to enlarge a photo you want to print. The steps are detailed and will ensure you enlarge images without impacting their quality.
1. The Quality of the Picture
The quality of your photo is one situation that you need to consider before you work with a low-quality image. Smaller images can be cumbersome to work with since they may end up appearing blurred. For this reason, check to confirm if the ideal resolution is achieved.
2. Sizes of the Print You Desire
The print size of an image directly depends on the total number of pixels per inch on a picture. Be sure to select a photo that meets the following requirements:
- 100-150 DPI
- 150-300 DPI
- Above 300 DPI
3. Sharpen Your Photos
When you want to enlarge your image for printing, you can use the sharpening strategy. The best part is: There are several options that you can use to increase the quality of your print picture. One of these methods includes utilizing an unsharp mask.
All you need to do is copy your photo, make the image you want to print a bit blurry than the original one. What follows is combining the two versions. The result will be a sharp and enlarged image.
4. Avoid Using JPEG Formats
Many people don't like files saved in JPEG formats since they lose some details after enlarging the image. Working with a file saved in JPEG format is challenging; you may end up losing critical details in the image. Besides, JPEGs were designed to look attractive on the web.
5. Use an Advanced Computer
An advanced computer is likely to give the option of improving the resolution of your picture through hardware optimization. Also, enlarging a photo requires a lot of memory, as it consumes up the memory of a PC.
Methods That You Can Use To Enlarge an Image To Print
Using offline options to enlarge an image to print is not as effective as online tools. If you would like to know how to enlarge an image to print, here are some methods you can use.
1. Windows Paint
If you choose to use Paint to resize an image before printing, follow the steps below:
- Go to your Windows Search Bar and type paint.
- Double click on the program to launch it.
- Click on Open to find the image on your PC and upload it on Paint by hitting the Open button.
- From the Home tab, click on the Resize option and Skew Icon.
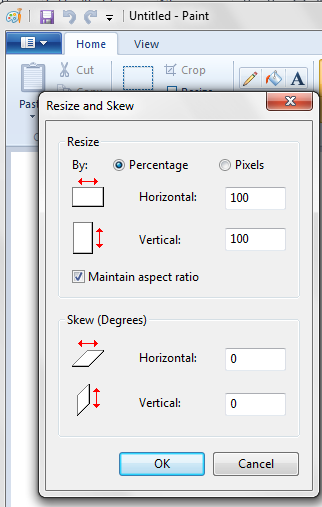
- You can adjust the height, width, and resolution.
- You can use the Text tool in Paint to add a caption.
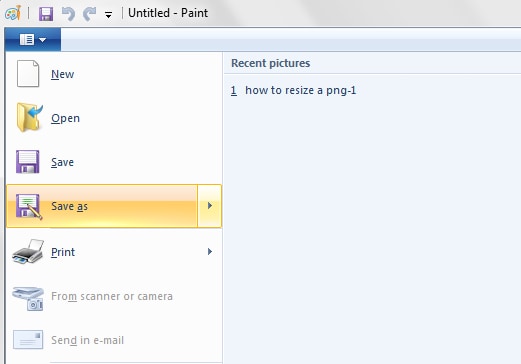
- Click the main tab, then choose Save as.
- Next, choose JPEG, then enter a short descriptive name and save the image.
2. Re-Sample Using Online Editing Tool
Whenever you try enlarging a photo, it can lose some resolution. Luckily, there are ways you can use to ensure you don't interfere with your picture quality. Re-sampling is a useful method when it comes to enlarging a photo.
It entails managing the color, composition, and other crucial details.
To resample a photo successfully, work with smaller increments. This way, your final image will be well prepared since you have emphasized the primary focus of a picture.
3. Scanning Technique
The scanning and printing technique is a suitable method for enlarging a photo. It is among the effective methods that you can use to enlarge the size of a print photo. However, it highly depends on the resolution of your scanner. A scanner with a high resolution can enlarge the size of an image up to 5 times bigger. Before you scan a photo, adjust the scanner settings to 1,200DPI. When you are scanning, alter the resolution of the digital image.
4. Using Adobe Photoshop
To enlarge an image using Photoshop, follow the steps below.
- Open your image
- Select image size
- You’ll see an Image Size dialog box.
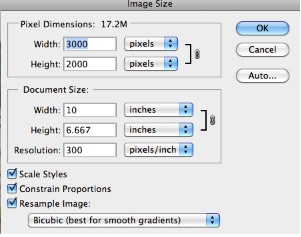
- Set the resolution, document size, and pixel dimension.
- Next, select Resampling Method, then click OK.
You have successfully resized your image.
5. Using Adobe Lightroom
If you have never used Adobe Lightroom, you should know that it has a Super Resolution feature. This feature can enlarge photos to triple their size. The best part is: It does not affect the quality of the image. Follow the steps below if you want to use Lightroom to enlarge a photo.
- Open the image in the Lightroom editing tool
- Hit the Import button to upload your image from your PC.
- Select the photo you would like to resize and click on File then Export.
- Choose your settings and change the size of your image, including width and height.

- Click on the Export button to save the image.
5. Using PixCut
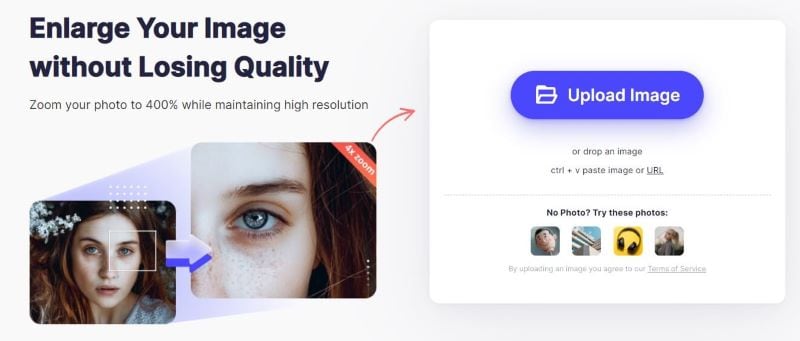
PixCut is an online image enlarging tool that enlarges images without affecting their quality. The best part is: You can enlarge the image up to 400%. All you have to do is follow the steps below to learn how to enlarge an image to print using PixCut.
Step 1
Go to the offical website.
Step 2
Hit the Upload Image button to upload your image from your device. You can also drop or copy and paste the image you would like to resize. The tool will automatically enlarge the photo. It can enlarge the photo up to 400%.
Step 3
Once PixCut has finished enlarging your photo, you can download it.
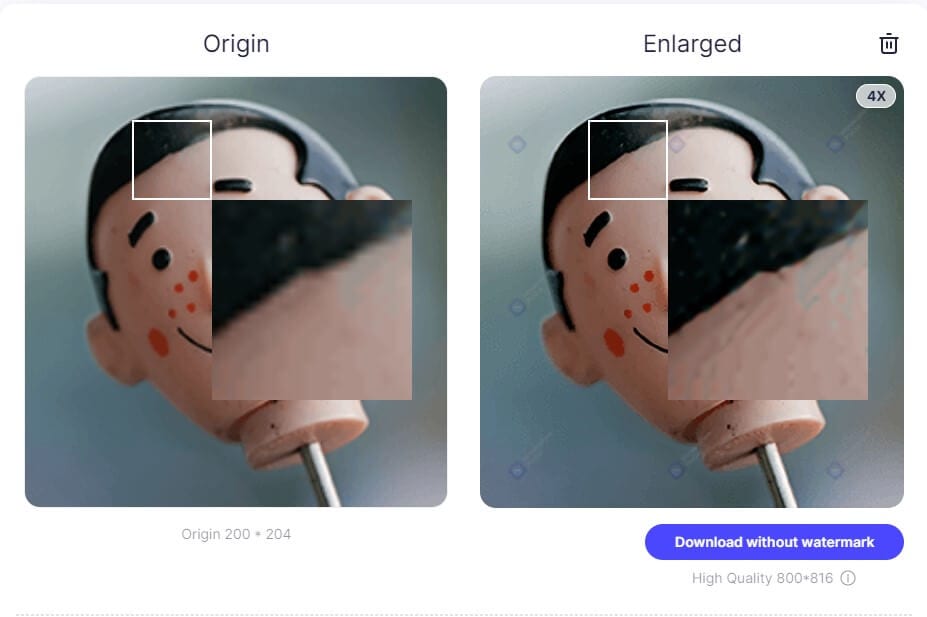
PixCut has proven to be more effective than other online enlarging tools on the internet since it uses an Automatic AI. Essentially, this is one of the best features that make PixCut stand out from its competitors. Also, it is fast, making sure that you save time when it comes to enlarging a photo.
Conclusion
You are now aware of some of the crucial factors you should consider when enlarging a photo to print. PixCut is the most reliable image enlarger that you can use before printing an image.