
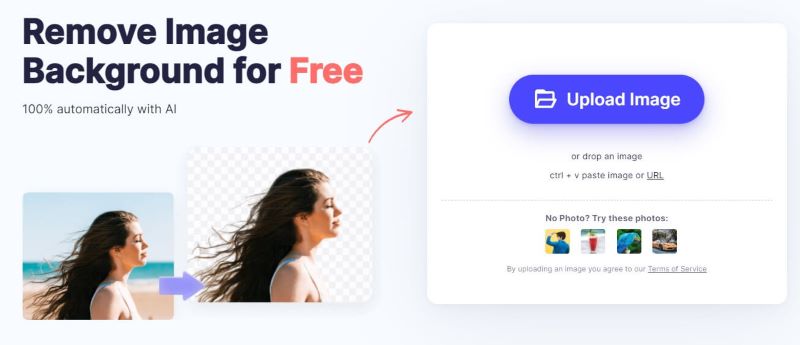
Free to Remove Image Background
Try PixCut which is 100% automatic with AI to remove your image background for free.
Adobe Illustrator is a drawing and graphics creation program that works well on both Mac and Windows systems. It allows you to create anything from simple icons to multi-layered diagrams. Illustrator also allows you to edit with pictures. When you need to remove the background from a picture, Illustrator may help. In Adobe Illustrator, you may use the magic wand or the pen tool to create the foreground object to remove the background from an image. Then select "Make Clipping Mask" from the context menu when right-clicking the image. It's easy to remove the background and use your image in websites or other creative projects after you've clicked on it.
Part 1:Step by Step Guide to remove background from in illustrator
1. Create a vector using Image Trace, then delete a background in Illustrator.
You'll almost certainly want to deal with vectors in Adobe Illustrator. Computer math is used to create vectorized pictures. They are crisper than normal pictures like JPEGs and do not get pixelated even when zoomed very close.
Illustrator is excellent at distinguishing the subject from the background. When it comes to eliminating a white background, Illustrator excels.
● Open a file from your PC and drag it onto the workspace.
● Using Window Image Trace, convert it to a vector. For the best results, choose High Fidelity Photo or one of the other two presets that best fits your picture.
● In Windows and Mac, go to View>Show Transparency Grid (or Shift+CTRL+D, Shift+Command+D, respectively). The checkerboard background, which indicates transparency, will appear.
● Expand the dropdown menu by clicking the Direct Selection tool (arrow) or Object. This will transform your Vector into a shape and bring up the anchor points.
● Select the background sections you wish to get rid of by clicking on them and selecting them. Press the Delete key. It's possible that you'll have to do this for each region.
● Make sure the Background Transparent Box is checked before exporting the file as a.PNG or EPS file (see previous tip).
2. Making Use of The Magic Wand tool
You can select to fill the color if the item you wish to separate is a solid color. If you choose this option, when you use the magic wand tool to click an item, it will select everything in your image that complements the selected object's fill color.
You can pick a stroke color if the item you want to choose is surrounded by a certain color line. The color of the line around an object is called stroke color, while the color of the area within the line is called fill color. If you choose the stroke color as your criteria, you'll specify the color by clicking the line that surrounds the item, not the inner part. When you pick this criteria and click the magic wand tool on a certain color line, all items that have that color line present surrounding them will be selected.
When you choose either stroke color or fill color, the tolerance box enables you to enter a value in pixels in the range of 0-255 for RGB and 0-100 for CMYK. When all of the colors in the area are matched when you click the magic wand tool, the number you specify in the tolerance box affects how pliable the tool should be.
The default value is 32px, which implies that selecting one color will select everything in that color's family. If the item includes a gradient, you may increase the tolerance to allow for the selection of more colors. For the most part, the default will suffice.
You may pick stroke weight to get lines of any hue with a comparable weight. This will choose all lines with a thickness that is comparable to the one you select. Numbers in the range of 0-1000 pixels are allowed in the stroke weight tolerance box. A lower number indicates a more precise match. The default value is 5px, which is unlikely to be precise enough for tiny lines.
Step1
We're going to utilize the same picture as before. From the toolbar, choose the magic wand tool.
Step2
On the image you want to retain, click the item you want to keep.Click once on the foreground object to choose it according to the standard specified in the magic wand tool's settings. Once you click on the desired item, a dotted outline will appear around it.
Step3
Hold down the shift key and click the background to pick both the background and the foreground item.Make a clipping mask by right-clicking the front-most image and selecting "Make a Clipping Mask."
Step4
The background will be removed, leaving just the foreground image and a white background. The Final Image will appear after that.
Part 2:Remove Background in One-click Using Wondershare PixCut
The number of internet tools for creating a transparent background has risen dramatically. People, on the other hand, look for the simplest and most straightforward software that will accomplish the job with the least amount of time and effort. That's why Wondershare PixCut is recognized for being the easiest tool for removing the background and elevating your own design.
It's a useful tool that allows you to quickly enhance your design abilities by adding fresh backgrounds and fascinating effects. You may edit and modify your favorite photos to give them a professional appearance. PixCut also tracks and eliminates the background from a few rough edges automatically. As a result, you no longer need to be aware when altering photos.
Many professionals, including freelancers, graphic designers, marketing firms, and students, utilize this automated background remover. You may also make cards for significant occasions such as birthdays, marriages, and business meetings.
Wondershare PixCut can assist you in realizing your visions and turning them into the innovations you want. Here are a few more of this tool's main features.
● It enables you to quickly erase the background.
● All of the basic and sophisticated functions are separated, making it simple to select.
● It may be used for a variety of reasons, including personal, social, e-commerce, and commercial.
● You may use the tool to preview a picture before completing it.
● With the provided templates, it gives you all the fundamental tools to crop, alter, or sharpen the picture.
● After you've finished making your picture, you may post it on social networking sites like Facebook, WhatsApp, or Instagram.
● Because it utilizes AI technology, the PixCut tool makes your job easier.

Wondershare PixCut - Remove Image Background for Free
Over 400,000 people have signed up.
Automatically Remove Image Background with AI
Bulk Remove Images’ Background in Ease
Enlarge Your Image without Losing Quality
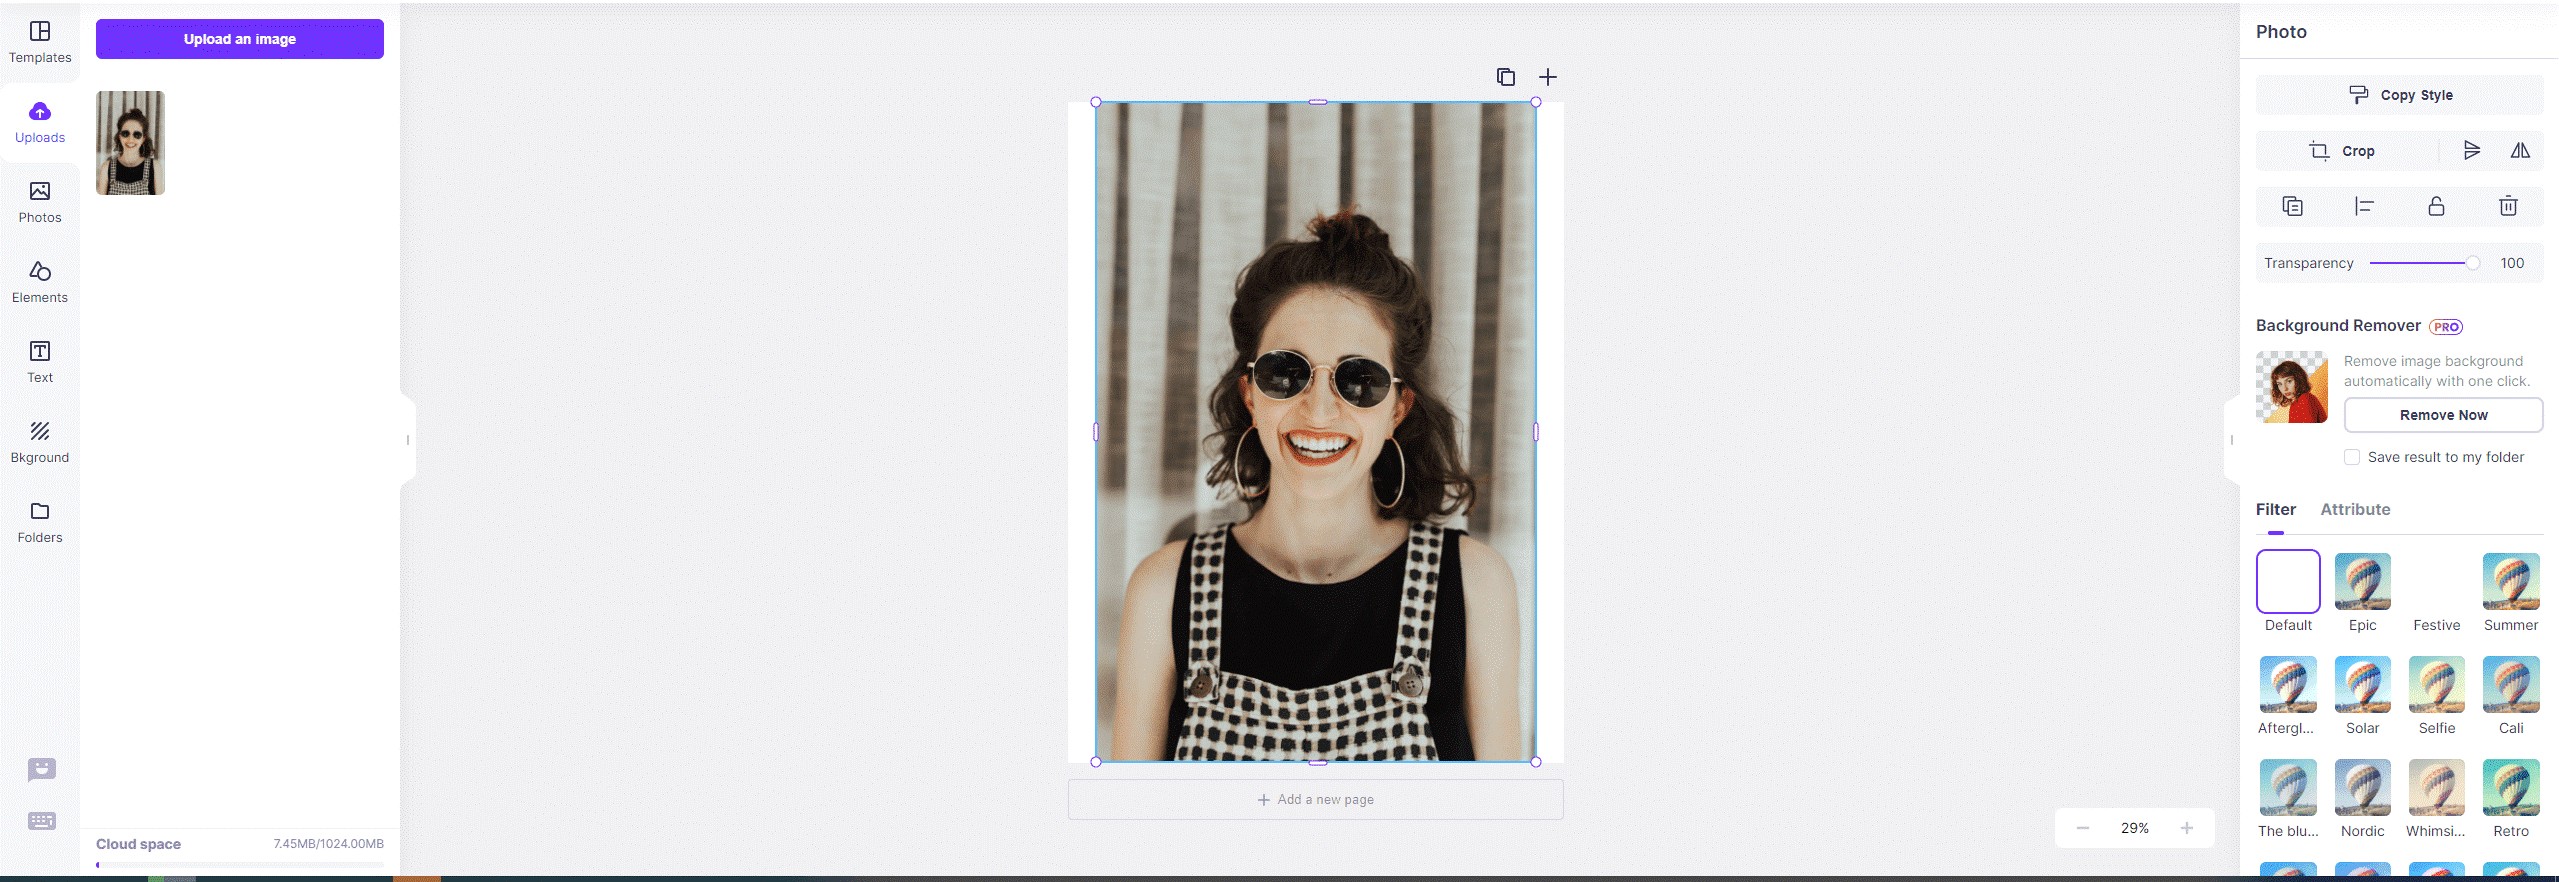
Step1 Drag and drop the picture into PixCut.
You must first submit the picture before you can begin the process of eliminating the background. To upload an image file, go to the media library and select the 'Upload Image' option. You may also drag, copy-paste, or type the image's URL into the program.
Step2 Remove the background from the picture you just uploaded.
When you submit a picture, PixCut will automatically trace it and eliminate the background. The whole procedure will be completed in a short amount of time.
Step3 Save the picture to your computer or mobile device.
Now that you have a background-free picture, you may download it in normal quality. However, if you want an HD-quality final picture, you'll need to upgrade to the PixCut Pro version. It's worth noting that each HD picture costs one credit.

Unlimited preview
Over 400,000 have signed up
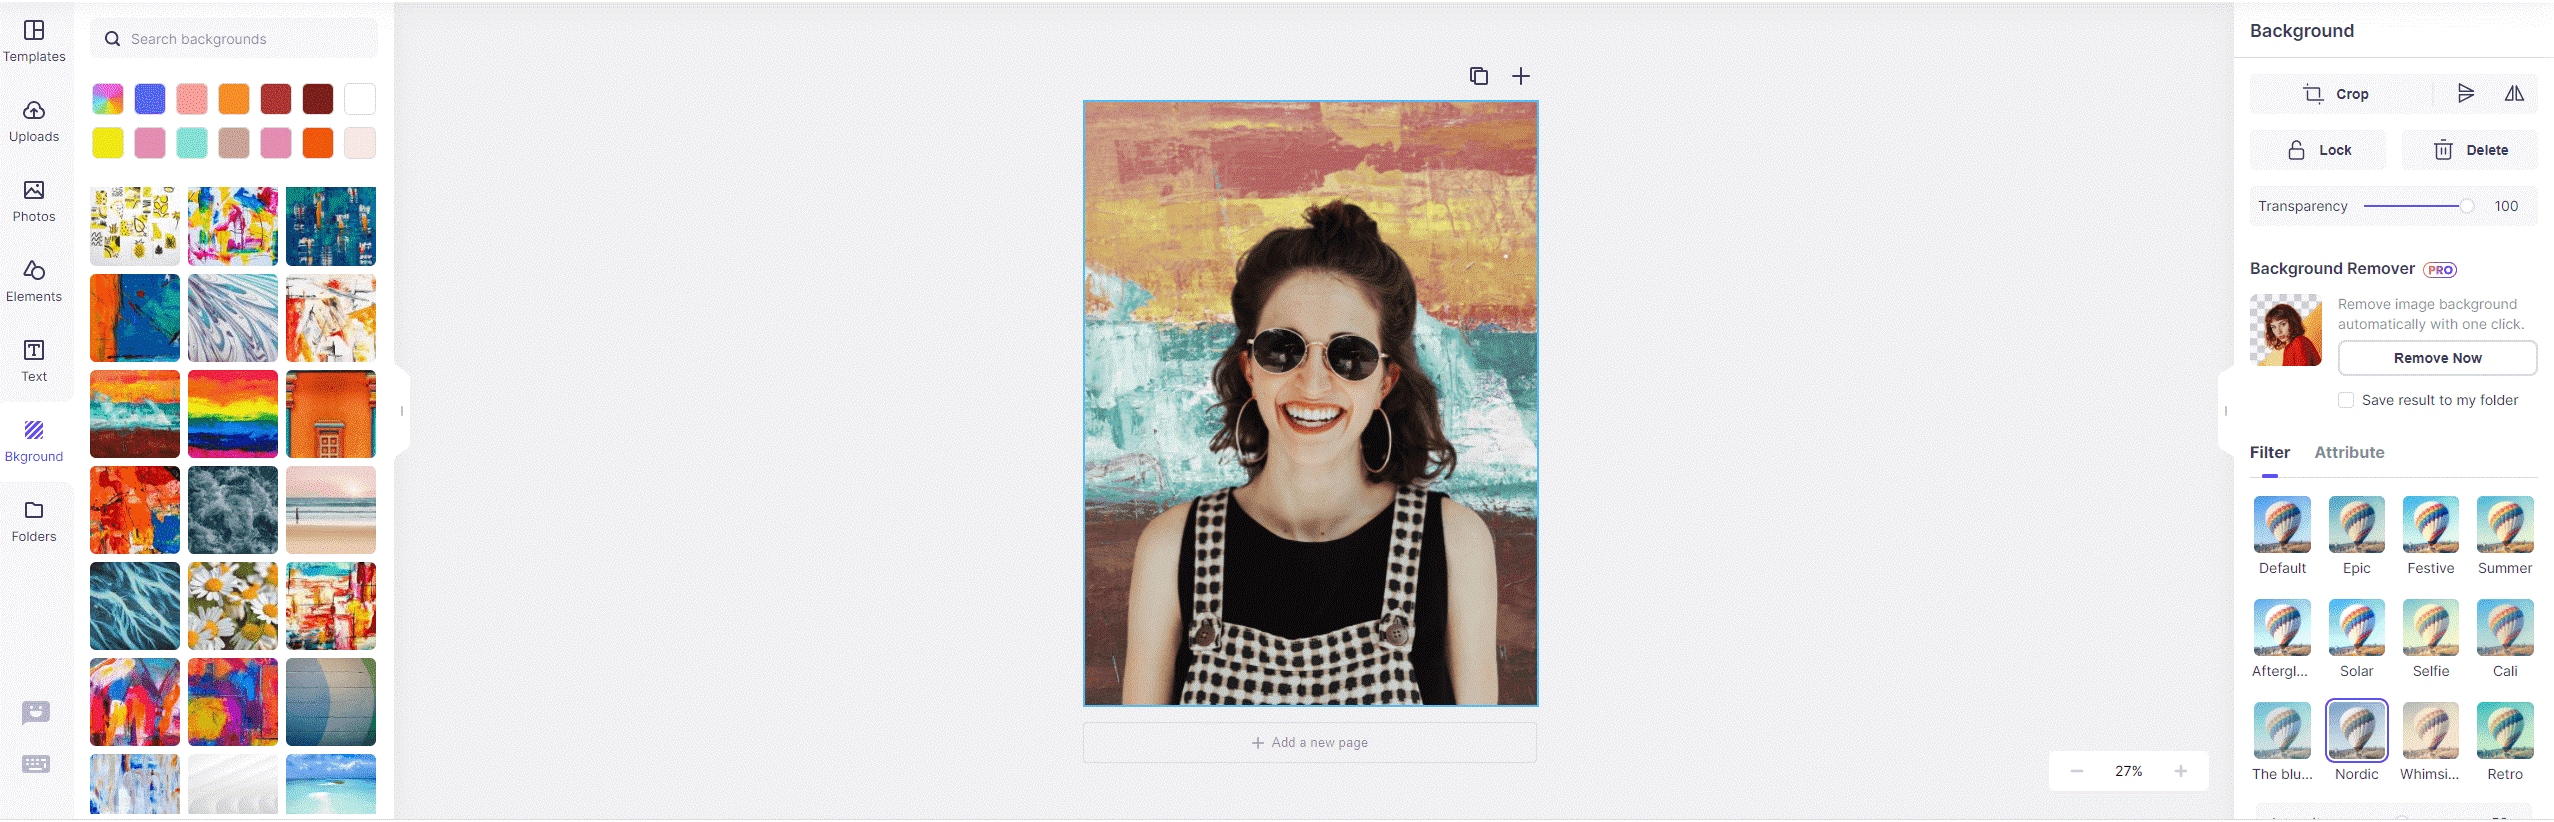
Part 3: Edit Photo Background with PixStudio after remove the Background.
This is a free online background changer apart from Illustrator for PC users, particularly novices who lack expert graphic design abilities. You can simply drag and drop each and every piece to make your design seem even better.
Wondershare PixStudio's Highlights
● You may select from a variety of fixed-size templates, which eliminates the need to resize your picture frequently.
● Allows you to quickly delete and replace the background of large pictures.
● Designed for those who wish to create something but don't have any prior experience in graphic design.
● You may utilize a large number of templates, components, and composing text tools.
● Download for free, but if your needs are more demanding, you may increase your plan for a reasonable fee.
Step1
Go to PixStudio's official home page and select "Start Design Now."

Step2
Select the target design you want to use. After you've uploaded the picture, attempt to remove the background by clicking "Remove Now."
Step3
On the left, click "Background" to alter the background color or to create a huge beautiful background. You may also choose your preferred effect.
Step4
You may obtain the final picture by downloading the photo for free.
Conclusion
There's a clear winner here, as per the revies and guidelines above! Adobe illustrator has a lot of excellent capabilities, but when it comes to simplicity of use, it certainly falls short. This is where Wondershare PixCut comes in. You will just remove the background of your picture without Illustrator in just one click. After removing the background with PixCut you can count on the online background editor – PixStudio – that comes with handy tools to enhance your picture.